淮阴工学院嵌入式系统开发与应用实验报告实验三 基本开发工具的使用.docx
《淮阴工学院嵌入式系统开发与应用实验报告实验三 基本开发工具的使用.docx》由会员分享,可在线阅读,更多相关《淮阴工学院嵌入式系统开发与应用实验报告实验三 基本开发工具的使用.docx(17页珍藏版)》请在冰豆网上搜索。

淮阴工学院嵌入式系统开发与应用实验报告实验三基本开发工具的使用
实验三基本开发工具的使用
一.实验目的
1.复习vi编辑器的使用
2.掌握gcc编译器的使用。
3.掌握gdb调试器的使用。
4.掌握make工具的使用。
二.实验内容
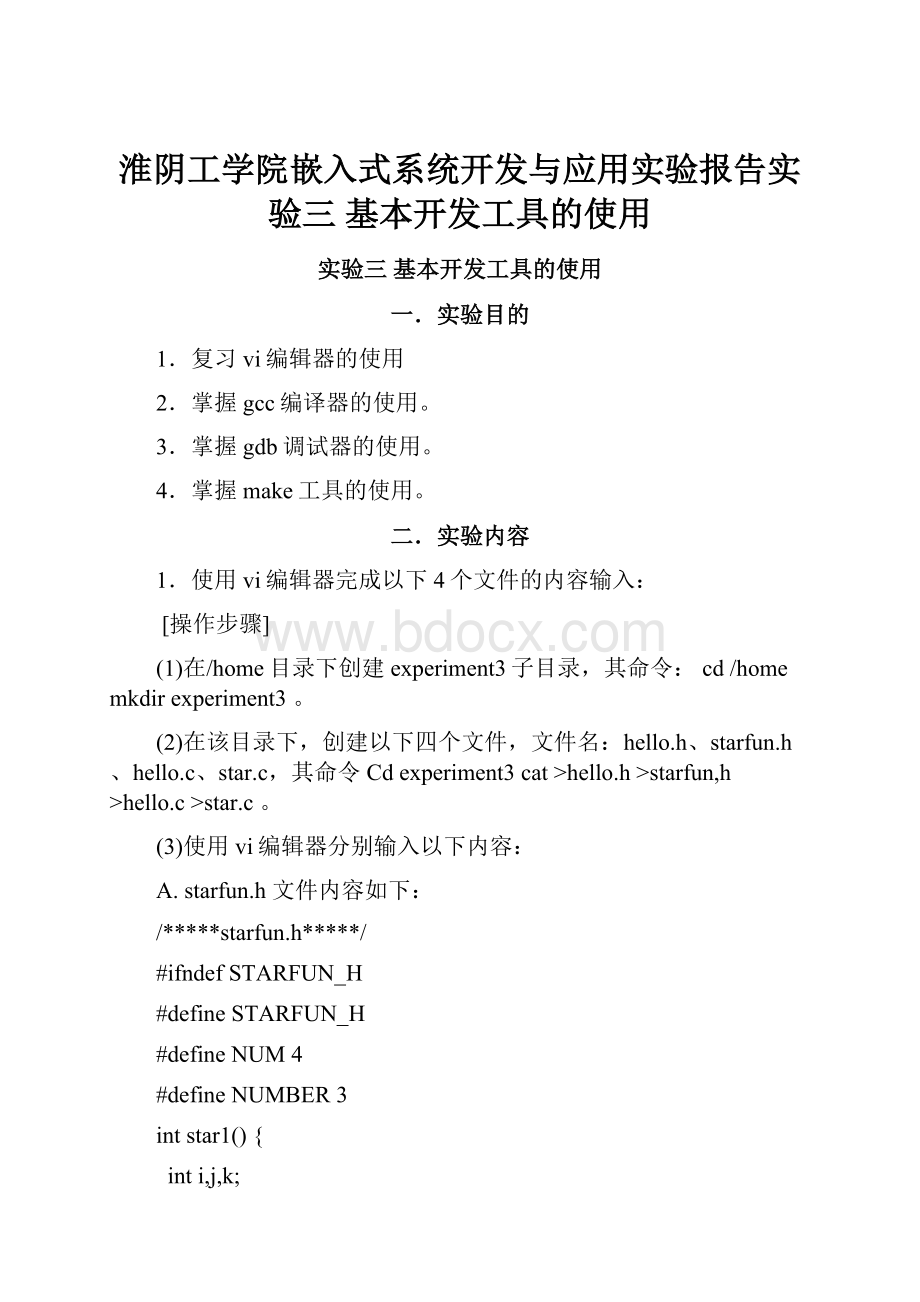
1.使用vi编辑器完成以下4个文件的内容输入:
[操作步骤]
(1)在/home目录下创建experiment3子目录,其命令:
cd/homemkdirexperiment3。
(2)在该目录下,创建以下四个文件,文件名:
hello.h、starfun.h、hello.c、star.c,其命令Cdexperiment3cat>hello.h>starfun,h>hello.c>star.c。
(3)使用vi编辑器分别输入以下内容:
A.starfun.h文件内容如下:
/*****starfun.h*****/
#ifndefSTARFUN_H
#defineSTARFUN_H
#defineNUM4
#defineNUMBER3
intstar1(){
inti,j,k;
for(k=1;k<=NUM;++k){
for(i=1;i<=(NUM-k);++i)
printf("");
for(j=1;j<=(2*k-1);++j)
printf("*");
printf("\n");
}
return0;
}
intstar2(){
inti,j,k;
for(k=NUMBER;k>=0;--k){
for(i=1;i<=(NUMBER-k+1);++i)
printf("");
for(j=1;j<=(2*k-1);++j)
printf("*");
printf("\n");
}
return0;
}
#endif
B.hello.h文件内容如下:
/*hello.h*/
#ifndefHELLO_H
#defineHELLO_H
voidhello(){
star1();
printf("hello,myfriends\n");
}
#endif
C.hello.c文件内容如下:
voidshowhello(){
hello();
}
D.star.c文件内容如下:
#include"starfun.h"
#include"hello.h"
#include
intmain(){
star1();
star2();
showhello();
return0;
}
2.使用gcc编译器,编译程序
[操作步骤]
(1)第一种方法:
分步进行
A.由star.cstarfun.h文件生成star.o目标文件:
gcc-cstar.c-ostar.o
B.由hello.chello.hstarfun.h生成hello.o目标文件
gcc-chello.c-ohello.o
C.由hello.ostar.o生成应用程序myprog
gccstar.ohello.o-omyprog
D.执行应用程序myprog
[root@localhost01_hello]#./myprog
执行情况截图:
(2)一条命令完成以上操作:
A.执行清屏命令:
clear
B.输入命令生成可执行程序myprog:
gccstar.chello.c-omyprog
C.执行程序myprog,其命令是:
./myprog:
D.执行情况截图:
3.常见选项的应用
(1)写出-Wll选项的作用:
允许发出gcc提供的所有有用的报警信息
(2)写出-w选项的作用:
关闭所有警告信息
(3)写出-v选项的作用并执行:
打印出编译器内部编译各过程的命令行信息和编译器的版本
(4)测试选项,列出结果:
[root@localhost01_hello]#gccstar.chello.c-omyprog
[root@localhost01_hello]#gcc-wstar.chello.c-omyprog
[root@localhost01_hello]#gcc-Wallstar.chello.c-omyprog
4.使用动态库
(1)[root@localhost01_hello]#gcc-c-fpichello.c
[root@localhost01_hello]#ls
(2)[root@localhost01_hello]#gcc-shared-s-olibhello.sohello.o
[root@localhost01_hello]#ls
(3)注意libhello.so库文件的命名格式,
(1)
(2)也可以用下边命令替代
gcc-fpic-shared-shello.c-olibhello.so
(4)[root@localhost01_hello]#cplibhello.so/usr/lib
注意/usr/lib为用户库自动搜索路径
(5)[root@localhost01_hello]#gcc-lhellostar.c-omystar
[root@localhost01_hello]#lddmystar
libhello.so=>/usr/lib/libhello.so(0x4002d000)
libc.so.6=>/lib/tls/libc.so.6(0x42000000)
/lib/ld-linux.so.2=>/lib/ld-linux.so.2(0x40000000)
[root@localhost01_hello]#./mystar
*
***
*****
*******
*****
***
*
*
***
*****
*******
hello,myfriends
5.使用静态库
[root@localhost01_hello]#rm*.o
rm:
是否删除一般文件‘hello.o’?
Y
[root@localhost01_hello]#rmmystar
rm:
是否删除一般文件‘mystar’?
Y
[root@localhost01_hello]#
[root@localhost01_hello]#rmlibhello.*
[root@localhost01_hello]#gcc-chello.c-ohello.o
[root@localhost01_hello]#ar-rclibhello.ahello.o
[root@localhost01_hello]#gccstar.clibhello.a-omystar
[root@localhost01_hello]#./mystar
*
***
*****
*******
*****
***
*
*
***
*****
*******
hello,myfriends
6.调试器的使用
(1)gdb
进入experiment3目录
执行
[root@localhost02_gdb]#gcc-gstar.chello.c-omyprog
[root@localhost02_gdb]#gdbmyprog
(2)gdb相关操作
A.查看文件,在gdb中键入“l”(list)就可以查看所载入的文件
B.设置断点,在gdb中设置断点非常简单,只需在“b”后加入对应的行号即可
C.查看断点情况,在设置完断点之后,用户可以键入“infob”来查看设置断点情况,在gdb中可以设置多个断点
D.运行代码,gdb默认从首行开始运行代码,可键入“r”(run)即可
E.查看变量值,在gdb中只需键入“p”+变量值即可
F.单步运行,单步运行可以使用命令“n”(next)或“s”(step)
G.恢复程序运行,可以使用命令“c”(continue)恢复程序的正常运行了.
7.利用GNUmake自动编译应用程序方法
1、利用文本编辑器创建hello.c文件
#include
intmain()
{
printf("WelcomeWANG\n");
return1;
}
2.利用文本编辑器创建一个makefile文件,并将其保存到与hello.c相同的目录下。
CC=gcc
CFLAGS=
all:
hello
hello:
hello.o
$(CC)$(CFLAGS)hello.o–ohello
hello.o:
hello.c
$(CC)$(CFLAGS)–chello.c–ohello.o
clean:
rm–rfhello*.o
2、先后执行如下命令
[root@local]$make
[root@local]$ls
[root@local]$./hello
3、执行makeclean命令:
[root@local]$makeclean
4、修改hello.c文件,重复第2、3步操作,查看并记录所生成的文件和运行结果,并与手动编译进行比较,写出你的结论。
Makefile可以在修改源文件后不用再次输入gcc调试命令,再次执行很方便。
5、重新编辑makefile文件(斜黑体表示修改部分)
CC=gcc
CFLAGS=
OBJS=hello.o
all:
hello
hello:
$(OBJS)
$(CC)$(CFLAGS)$^-o$@
hello.o:
hello.c
$(CC)$(CFLAGS)–c$<-o$@
clean:
rm–rfhello*.o
6、重复第2,3步操作,查看并记录所生成的文件和运行的结果。
比较这两种操作,写出你的结论。
同时指出$^、$@、$<在上述Makefile中的含义。
7、多个.c文件的编译
1)创建文件hello1.c、hello2.c、hello.h和makefile
//hello1.c
#include
intmain()
{
printf("WelcomeEmdoor!
\n");
test2();
return1;
}
//hello2.c
#include"hello2.h"
#include
voidtest2(void)
{
printf("WelcomeEmdoor!
–hello2\n");
}
//hello2.h
voidtest2(void);
#makefiletestformultifilesprogram
CC=gcc
CFLAGS=
OBJS=hello1.ohello2.o
all:
hello
hello:
$(OBJS)
$(CC)$(CFLAGS)$^-o$@
hello1.o:
hello1.c
$(CC)$(CFLAGS)–c$<-o$@
hello2.o:
hello2.c
$(CC)$(CFLAGS)–c$<-o$@
clean:
rm–rfhello*.o
2)先后执行如下命令
[root@local]$make
[root@local]$ls
[root@local]$./hello
三.实验结论