Red Hat Linux AS4 Update7 安装 LAMP环境手记.docx
《Red Hat Linux AS4 Update7 安装 LAMP环境手记.docx》由会员分享,可在线阅读,更多相关《Red Hat Linux AS4 Update7 安装 LAMP环境手记.docx(12页珍藏版)》请在冰豆网上搜索。
RedHatLinuxAS4Update7安装LAMP环境手记
RedHatLinuxAS4Update7安装LAMP环境手记
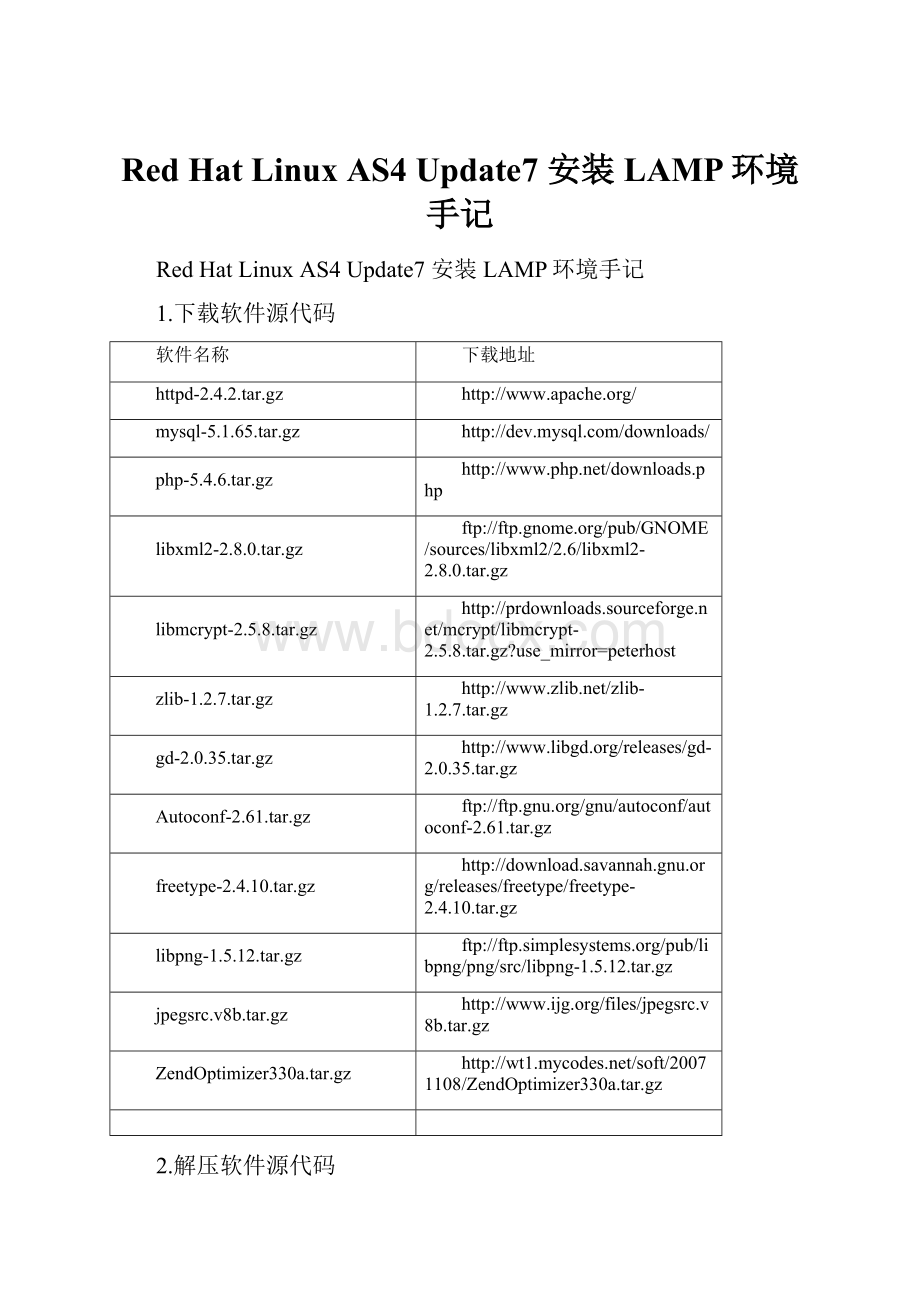
1.下载软件源代码
软件名称
下载地址
httpd-2.4.2.tar.gz
http:
//www.apache.org/
mysql-5.1.65.tar.gz
php-5.4.6.tar.gz
libxml2-2.8.0.tar.gz
ftp:
//ftp.gnome.org/pub/GNOME/sources/libxml2/2.6/libxml2-2.8.0.tar.gz
libmcrypt-2.5.8.tar.gz
zlib-1.2.7.tar.gz
gd-2.0.35.tar.gz
http:
//www.libgd.org/releases/gd-2.0.35.tar.gz
Autoconf-2.61.tar.gz
ftp:
//ftp.gnu.org/gnu/autoconf/autoconf-2.61.tar.gz
freetype-2.4.10.tar.gz
http:
//download.savannah.gnu.org/releases/freetype/freetype-2.4.10.tar.gz
libpng-1.5.12.tar.gz
ftp:
//ftp.simplesystems.org/pub/libpng/png/src/libpng-1.5.12.tar.gz
jpegsrc.v8b.tar.gz
http:
//www.ijg.org/files/jpegsrc.v8b.tar.gz
ZendOptimizer330a.tar.gz
2.解压软件源代码
命令格式:
#tar–zxvf(软件包名称)
3.配置安装软件
安装libxml2
./configure--prefix=/usr/local/libxml2
#make
#makeinstall
安装libmcrypt
./configure--prefix=/usr/local/libmcrypt
#make
#makeinstall
安装zlib
./configure--prefix=/usr/local/zlib
#make
#makeinstall
安装libpng
./configure--prefix=/usr/local/libpng
#make
#makeinstall
安装jpeg8
#mkdir/usr/local/jpeg6//建立jpeg6软件安装目录
#mkdir/usr/local/jpeg6/bin//建立存放命令的目录
#mkdir/usr/local/jpeg6/lib//创建jpeg6库文件所在目录
#mkdir/usr/local/jpeg6/include//建立存放头文件目录
#mkdir-p/usr/local/jpeg6/man/man1//建立存放手册的目录
#./configure\
>--prefix=/usr/local/jpeg6/\
>--enable-shared\//建立共享库使用的GNU的libtool
>--enable-static//建立静态库使用的GNU的libtool
#Make&&makeinstall
mkdir/usr/local/jpeg8
mkdir/usr/local/jpeg8/bin
mkdir/usr/local/jpeg8/lib
mkdir/usr/local/jpeg8/include
mkdir-p/usr/local/jpeg8/man/man1
./configure--prefix=/usr/local/jpeg8/--enable-shared--enable-static
Make&&makeinstall
安装freetype
./configure--prefix=/usr/local/freetype
#make
#makeinstall
安装autoconf
./configure
#make
#makeinstall
安装GD库
./configure\//配置命令
>--prefix=/usr/local/gd2/\//指定软件安装的位置
>--with-zlib=/usr/local/zlib/\//指定到哪去找zlib库文件的位置
>--with-jpeg=/usr/local/jpeg6/\//指定到哪去找jpeg库文件的位置
>--with-png=/usr/local/libpng/\//指定到哪去找png库文件的位置
>--with-freetype=/usr/local/freetype///指定到哪去找freetype2.x字体库的位置
Make&&makeinstall
./configure--prefix=/usr/local/gd2/--with-zlib=/usr/local/zlib/--with-jpeg=/usr/local/jpeg8/--with-png=/usr/local/libpng/--with-freetype=/usr/local/freetype/
Make&&makeinstall
编译gd-2.0.35.tar.gz时报错:
gcc-DHAVE_CONFIG_H-I.-I.-I.-I/usr/local/freetype/include/freetype2-I/usr/local/freetype/include-I/usr/local/freetype/include-I/usr/local/jpeg/include-g-O2-MTgd_png.lo-MD-MP-MF.deps/gd_png.Tpo-cgd_png.c-fPIC-DPIC-o.libs/gd_png.o
gd_png.c:
16:
53:
error:
png.h:
Nosuchfileordirectory
gd_png.c:
47:
error:
expectedspecifier-qualifier-listbefore‘jmp_buf’
gd_png.c:
54:
error:
expected‘)’before‘png_ptr’
gd_png.c:
82:
error:
expected‘)’before‘png_ptr’
gd_png.c:
92:
error:
expected‘)’before‘png_ptr’
解决办法:
vigd_png.c
将
#include“png.h”
替换成:
#include“/usr/local/libpng/include/png.h”
然后再make就可以了
注:
include“”双引号里包含的是libpng安装的路径里的include文件夹里的png.h文件
安装Apache
#./configure\//执行当前目录下软件自代的配置命令
>--prefix=/usr/local/apache2\//指定Apache软件安装的位置
>--sysconfdir=/etc/httpd\//指定Apache服务器的配置文件存放位置
>--with-z=/usr/local/zlib/\//指定zlib库文件的位置
>--with-included-apr\//使用捆绑APR/APR-Util的副本
>--enable-so\//以动态共享对象(DSO)编译
>--enable-deflate=shared\//缩小传输编码的支持
>--enable-expires=shared\//期满头控制
>--enable-rewrite=shared\//基于规则的URL操控
>--enable-static-support//建立一个静态链接版本的支持
./configure--prefix=/usr/local/apache2--with-apr=/usr/local/apr--with-apr-util=/usr/local/apr-util/--with-pcre=/usr/local/pcre--sysconfdir=/etc/httpd--with-z-dir=/usr/local/zlib/--with-included-apr--enable-so--enable-deflate=shared--enable-expires=shared--enable-rewrite=shared--enable-static-support
make&&makeinstall
/usr/local/apache2/bin/apachectlstart
⏹//启动Apache
/usr/local/apache2/bin/apachectlstop
⏹//关闭Apache
#netstat-tnl|grep80//查看80端口是否开启
echo"/usr/local/apache2/bin/apachectlstart">>/etc/rc.d/rc.local
⏹//添加Apache自动启动
修改使能自动启动
#cp/usr/local/apache2/bin/apachectl/etc/rc.d/init.d/httpd//(httpd名称可随意,自己可识别即可)
#vi/etc/rc.d/init.d/httpd
#!
/bin/sh
添加#chkconfig:
359015
添加#description:
apachehttpd-2.4.2
#chkconfig--addhttpd//添加服务名称
#chkconfig--list
Servicehttpdstop//停止Apache服务(服务名称为上面chkconfig–addhttpd的名称)
Servicehttpdstart//启动Apache服务
configure:
error:
BundledAPRrequestedbutnotfound
解决办法:
1.下载所需软件包:
wgethttp:
//archive.apache.org/dist/apr/apr-1.4.5.tar.gz
wgethttp:
//archive.apache.org/dist/apr/apr-util-1.3.12.tar.gz
wget
2.编译安装:
yumremoveapr-util-develaprapr-util-mysqlapr-docsapr-develapr-utilapr-util-docs
具体步骤如下:
a:
解决aprnotfound问题>>>>>>
[root@xttest]#tar-zxfapr-1.4.5.tar.gz
[root@xttest]#cdapr-1.4.5
[root@xtapr-1.4.5]#./configure--prefix=/usr/local/apr
[root@xtapr-1.4.5]#make&&makeinstall
b:
解决APR-utilnotfound问题>>>>
[root@xttest]#tar-zxfapr-util-1.3.12.tar.gz
[root@xttest]#cdapr-util-1.3.12
[root@xtapr-util-1.3.12]#./configure--prefix=/usr/local/apr-util--with-apr=/usr/local/apr/bin/apr-1-config
[root@xtapr-util-1.3.12]#make&&makeinstall
c:
解决pcre问题>>>>>>>>>
[root@xttest]#unzip-opcre-8.10.zip
[root@xttest]#cdpcre-8.10
[root@xtpcre-8.10]#./configure--prefix=/usr/local/pcre
[root@xtpcre-8.10]#make&&makeinstall
4.最后编译Apache时加上:
--with-apr=/usr/local/apr--with-apr-util=/usr/local/apr-util/--with-pcre=/usr/local/pcre
成功编译完成~
若在编译时出现:
BundledAPRrequestedbutnotfoundat./srclib/的错误
需要将apr-1.4.6.tar.gzapr-util-1.4.1.tar.gz解压到httpd-2.4.2文件夹内的srclib文件中再进行编译
Cp–rfapr-1.4.6httpd-2.4-2/srclib/apr
Cp–rfapr-util-1.4.1httpd-2.4.2/srclib/apr-util
安装Mysql
#groupaddmysql
⏹//添加一个mysql标准组
useradd-gmysqlmysql
⏹//添加mysql用户并加到mysql组中
#./configure--prefix=/usr/local/mysql--with-extra-charsets=all
#make&&makeinstall
创建MySQL数据库服务器的配置文件
#cpsupport-files/my-f/etc/f
创建授权表
bin/mysql_install_db--user=mysql
#chown-Rroot .//将文件的所有属性改为root用户
#chown-Rmysqlvar//将数据目录的所有属性改为mysql用户
#chgrp-Rmysql.//将组属性改为mysql组
#/usr/local/mysql/bin/mysqld_safe--user=mysql&启动数据库
#netstat-tnl|grep3306//查看3306端口是否开启
#bin/mysqladminversion//简单的测试
#bin/mysqladminvariables//查看所有mysql参数
#bin/mysql-uroot//没有密码可以直接登录本机服务器
mysql>DELETEFROMmysql.userWHEREHost='localhost'ANDUser='';
mysql>FLUSHPRIVILEGES;
mysql>SETPASSWORDFOR'root'@'localhost'=PASSWORD('123456');
#bin/mysql-uroot-hlocalhost–p//回车进入MySQL客户端
#bin/mysqladmin-uroot–pshutdown//关闭MySQL数据库
MySQL数据库早就提供了另外一种更加方便的启动方式。
进入/usr/local/mysql/share/mysql/下面会找到一个mysql.server文件,它的属性是755。
我们把它复制到/etc/init.d/下面,并把它加入到系统服务表中,您就可以在任何地方用servicemysqlstart语句来启动它
cd/usr/local/mysql/share/mysql
cpmysql.server/etc/init.d/mysql
chkconfig--addmysql//添加服务
servicemysqlstart//启动mysql
servicemysqlstop//停止mysql
在linux下修改mysql的配置文件f,文件位置默认/etc/f文件
找到客户端配置[client]在下面添加
default-character-set=utf8默认字符集为utf8
在找到[mysqld]添加
default-character-set=utf8默认字符集为utf8
character-set-server=utf8
default-collation=utf8_unicode_ci
init_connect='SETNAMESutf8'(设定连接mysql数据库时使用utf8编码,以让mysql数据库为utf8运行)
修改好后,重新启动mysql即可,查询一下showvariableslike'character%';
安装PHP
☐#./configure\//执行当前目录下软件自代的配置命令
☐>--prefix=/usr/local/php\//设置PHP5的安装路径
☐>--with-config-file-path=/usr/local/php/etc\//指定PHP5配置文件存入的路径
☐>--with-apxs2=/usr/local/apache2/bin/apxs\//告诉PHP查找Apache2的地方
☐>--with-mysql=/usr/local/mysql/\//指定MySQL的安装目录
☐>--with-libxml-dir=/usr/local/libxml2/\//告诉PHP放置libxml2库的地方
☐>--with-png-dir=/usr/local/libpng/\//告诉PHP放置libpng库的地方
☐>--with-jpeg-dir=/usr/local/jpeg8/\//告诉PHP放置jpeg库的地方
☐>--with-freetype-dir=/usr/local/freetype/\//告诉PHP放置freetype库的地方
☐>--with-gd=/usr/local/gd2/\//告诉PHP放置gd库的地方
☐>--with-zlib-dir=/usr/local/zlib/\//告诉PHP放置zlib库的地方
☐>--with-mcrypt=/usr/local/libmcrypt/\//告诉PHP放置libmcrypt库的地方
☐>--with-mysqli=/usr/local/mysql/bin/mysql_config\//变量激活新增加的MySQLi功能
☐>--enable-soap\//变量激活SOAP和Webservices支持
☐>--enable-mbstring=all\//使多字节字符串支持
☐>--enable-sockets//变量激活socket通讯特性
./configure--prefix=/usr/local/php--with-config-file-path=/usr/local/php/etc--with-apxs2=/usr/local/apache2/bin/apxs--with-mysql=/usr/local/mysql--with-libxml-dir=/usr/local/libxml2/--with-png-dir=/usr/local/libpng--with-jpeg-dir=/usr/local/jpeg8--with-freetype-dir=/usr/local/freetype--with-gd=/usr/local/gd2--with-zlib-dir=/usr/local/zlib--with-mcrypt=/usr/local/libmcrypt--with-mysqli=/usr/local/mysql/bin/mysql_config--enable-soap--enable-mbstring=all--enable-sockets
☐#make&&makeinstall
#cpphp.ini-production/usr/local/php/etc/php.ini//创建配置文件
vi/etc/httpd/httpd.conf//使用vi编辑apache配置文件
⏹Addtypeapplication/x-httpd-php.php.phtml#添加这一条
安装php时报gd相关的错误(gd_ctx.c)
在安装php时,报如下错误
Infileincludedfrom/kk/php-5.4.0/ext/gd/gd.c:
103:
/kk/php-5.4.0/ext/gd/gd_ctx.c:
Infunction‘_php_image_stream_putc’:
/kk/php-5.4.0/ext/gd/gd_ctx.c:
51:
错误:
‘structgdIOCtx’没有名为‘data’的成员
/kk/php-5.4.0/ext/gd/gd_ctx.c:
Infunction‘_php_image_stream_putbuf’:
/kk/php-5.4.0/ext/gd/gd_ctx.c:
58:
错误:
‘structgdIOCtx’没有名为‘data’的成员
/kk/php-5.4.0/ext/gd/gd_ctx.c:
Infunction‘_php_image_stream_ctxfree’:
/kk/php-5.4.0/ext/gd/gd_ctx.c:
67:
错误:
‘structgdIOCtx’没有名为‘data’的成员
/kk/php-5.4.0/ext/gd/gd_ctx.c:
68:
错误:
‘structgdIO
 升级会员
升级会员 