Keil5使用说明.docx
《Keil5使用说明.docx》由会员分享,可在线阅读,更多相关《Keil5使用说明.docx(11页珍藏版)》请在冰豆网上搜索。
Keil5使用说明
双击KeiluVision5快捷方式,运行KeiluVision5
1、新建工程
[Project]->[NewuVisionProject…]
(自
定义),输入文件名(例TestOI)
[保存]
2、选择CPU型号
展开[Freescale],选择[K60Series]下[MK60DN512xxx10]
[OK]
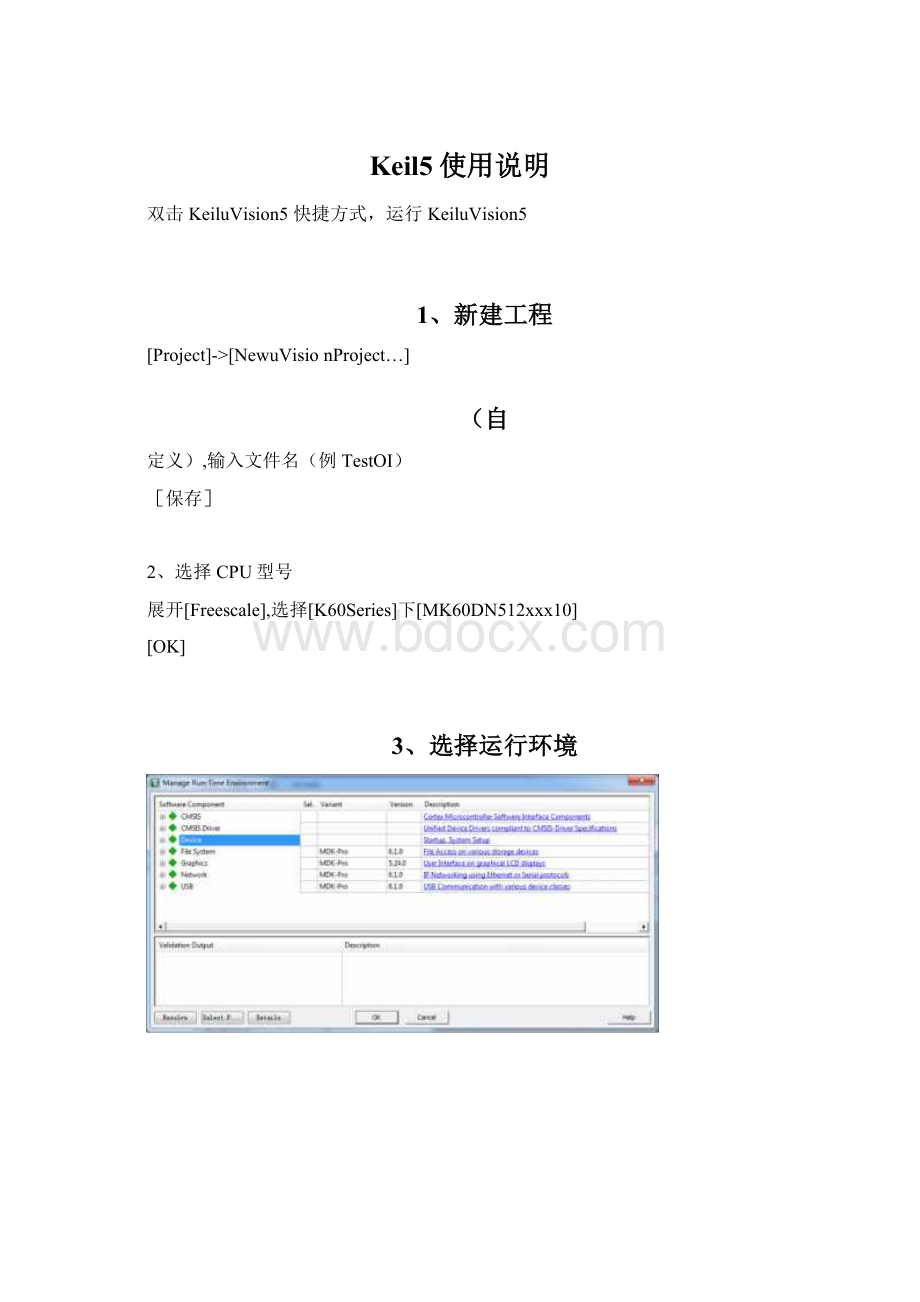
3、选择运行环境
勾选[Device]->[Startup]
衬I2J
ValidationOutputDescription
0丄Keit:
Device:
Stdftup
Addil!
tonalsuftwarecomponent'srequired
日requireCMSlSzCORE
SellretccmpDnentfr口Hilirt
*ARMiCIM^CORE
CM5IS-E1OREforCortei-M,HDOQ.andK30G
Res-plve
SelectP..Details
0、|CtkcI
[OK]
p7
4、设置属性
[Project]->[OptionsforTarget'Target1'・・・ALT+F7]
或选中Targetl后,鼠标右键,选择[OptionsforTarget'Targetl'・・・ALT+F7]
UOptionsforTargetI'argetT
Fr^escaeMK6DDN512uoc10
SystemViewerFile
|MKG0D10.svd
UseCustomRte
ReactsnlyMemioryrreas
defauloff-chip
StartSiieStartup
rRONI1:
IIr
厂ROM21
II广
rRONI31
II「
onchip
RIROM1:
|&0I&30OT0金
厂IROM2:
IIr
CodeGenerauon
ARMCompJer;|UsernstaJIedversion厂UseCross-ModuleOptinnzatign厂UseMicroLIB厂BigEndian
Read/V/riteMemoryAreas
defaultoff-chip
Slait
SizeNolnit
rRAMI:
r
厂RAM2:
||r
rRAM3:
I|厂
on-chip
PIRAM1:
&20000000
0x10000r
厂IRAM2:
OdFFFOQQO
otioom厂
□K
Cancel
Defaults;
Target属性页,根据开发板上硬件,填入相应晶体频率如图红框所示
DOptionsforTargetTarget1'
C/C++属性页,选择[IncludePaths后[・・・]按纽,如图红框如示
匕OptionsforTargetTarget1'
Dtvice]
Target|Output|Listinc\VierC/C++
Asm|Lii^kar|
Dtbuc]Vtilitiai|
卩応口rocessorSymbols
Refine:
|
Unddiie:
I
选择工具栏上[New/Insert]按纽,,如图红框如示
选择[C:
\Keil_v5\ARM\Pack\ARM\CMSIS\4.2.0\CMSIS\Include]目录
[OK]
Debug属性页,选择PEMicroDebugger调试器,如图红框所示
£3OptiomsforTarget"Target1
Device\Tsr(*tOutputListingVstr|C/C++\Asm|Linker%bu帛||
广UseSmutatorSellings
I-LmnitSpeedtoReal-Tinne
丽Load.^ptcationMStartupR?
RuitomainQInitiafizaticnFfe:
...Edit..
RedoneDebugSessionSettings
叼Breakpoints庄Toolbox
層WatchWindows&PeifcMTnanceAnalyzer两MtemotyDuplay啟SystemViewer
0LoadApplicationatSartutp丽RuntoEairiQInitializdftion]File:
I
-RestoreDebugSessionSettings
硬BreakpointsWToobtw
寸WatchV/indowg
I?
MemoryDisplay疗SystemViewer
CPUDLL:
Parwnetw:
SARMCM1DLL|
DrivsrDLL.Parameter:
卩ARMCM3.DLL「
DialogDILL:
Parameter:
IPCM.DLLhCM4
DialogDLL:
Parameter-
Defaults
[OK]
5、例程
展开[]Target1]
选择[SourceGroupI],单击鼠标右键,选择[AddNewltemto'SourceGroupI']
Type:
[cFle(.c)
Name:
Location:
;|C;VJ&e「$\2hmj刃-SBJQgnwts米eil
Add|dose
Help
选择CFile(.c),选择文件夹路径(自定义),填写文件名Test01
AddNewItemtoGroup'SourceGroup1'
CFil*cc)
C++File(-epp)
AsmFileCs)
HttdtrFiliCh)
TextFile(,tzt)
ImageFile(.*)
Vs.«rC^dtmpl*t
CrestEanewCsourcefifeandaddittotheprajectP
Tvpe:
Name:
|3L3C1
iTesTOl-
LOCibOH!
pVJ显苗讪Ouyj—SBUQMurnefitS^IXTtStQJ
Adddose
Help
加入如下代码
#include"MK60D10.h"
voiddelay(void){
inti,j;
for(i=0;iv1000;i++)for(j=0;jv1000;j++)
;
}
intmain(void){
unsignedintcounter=0;
SIM->SCGC5|=(0x1fv<9);//Turnonallportclocks〃SetPTA28,andPTA29(LED's)forGPIOfunctionalityPORTA->PCR[28]|=(1v<8);
PORTA->PCR[29]|=(1v<8);〃ChangePTA28,PTA29tooutputsPTA->PDDR|=(0x03vv28);
//turnonPTA29
PTA->PDOR|=(0x01vv29);
for(;;){
PTA->PTOR|=1vv28;counter++;
delay();
6、编译
[Project]->[BuildTargetF7]
或单击编译工具栏中Build图标
摩圏丁一|舅|Target1尺恳|
修改并编译至0Error(s),0Warning(s)・
7、调试
[Debug]->[Start/StopDebugSessionCtrl+F5]或单击调试工具栏中Start/StopDebugSessioiH标
[Connect(Reset)]
 升级会员
升级会员 