Struts21+Spring30+hibernate33全自动整合教程.docx
《Struts21+Spring30+hibernate33全自动整合教程.docx》由会员分享,可在线阅读,更多相关《Struts21+Spring30+hibernate33全自动整合教程.docx(18页珍藏版)》请在冰豆网上搜索。
Struts21+Spring30+hibernate33全自动整合教程
以前面试的时候是整合的hibernate3.0+spring2.0+struts1.2因为以前MyEclipse版本比较低.根本不支持SSH高版本…但是在没找到工作之前,我面试,不经意问了一句,咱们公司使用什么开发工具,那个经理说.MyEclipse8.5.回头我自己就想?
使用MyEclipse8.5你在整合那么低的版本岂不是叫人家笑话?
可神不知,鬼不觉的来到了哈尔滨这家公司.于是乎,但疼的想起来以前的这个问题.所以想到现在肯能有些人依然会面临这样的问题.所以做了一下总结.
由于SSH框架,配置文件过多.而某些公司强行要面试这些内容.只要你搭建上了就要你.而你又记不住?
所以我就这一点做了一套SSH全自动整合.当然,某些也需要自己添加点代码.但是相对于全手动.还是简便不少.废话少说.打开MyEclipse8.5Comeon!
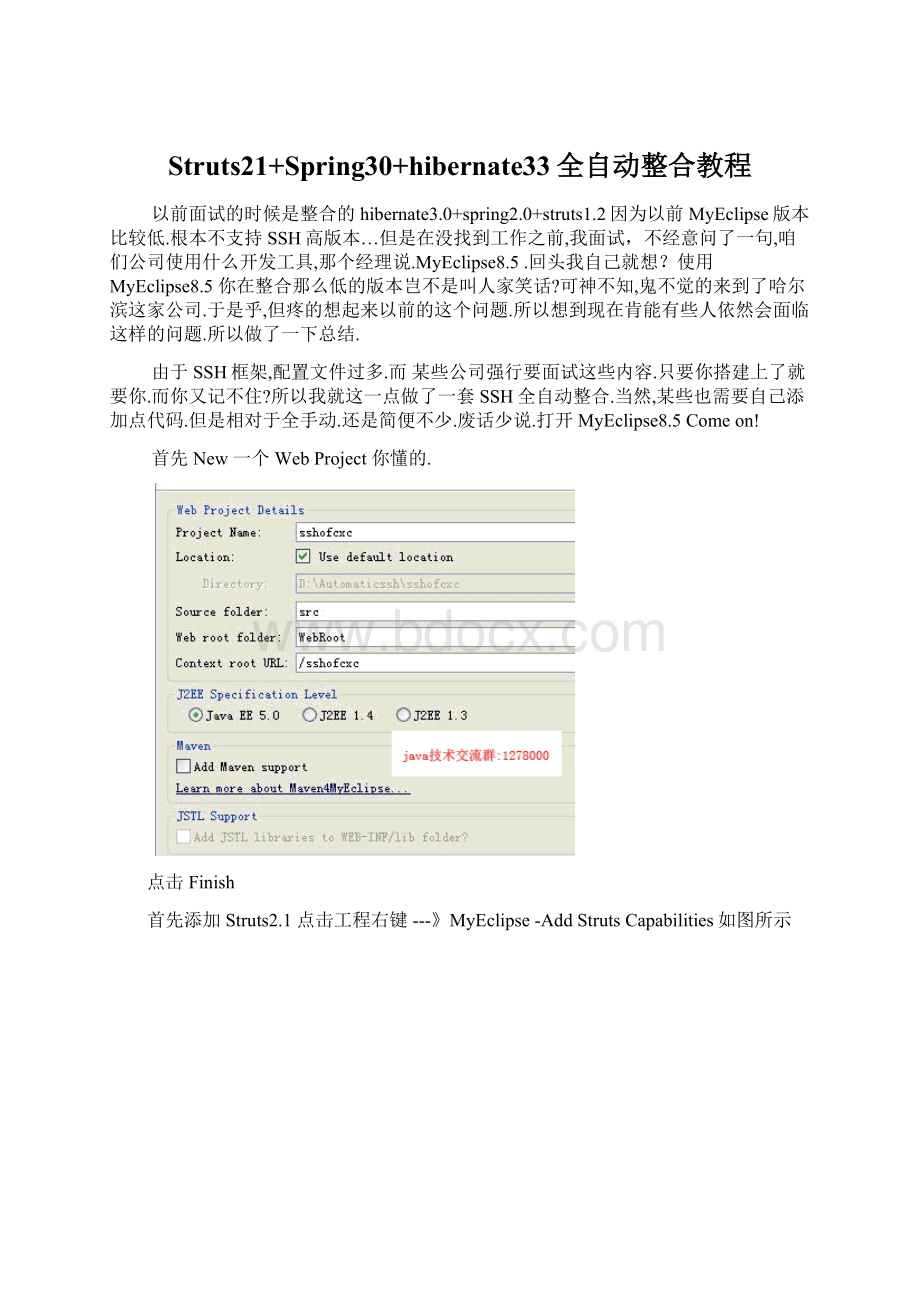
首先New一个WebProject你懂的.
点击Finish
首先添加Struts2.1点击工程右键---》MyEclipse-AddStrutsCapabilities如图所示
选择Struts2.1拦截所有.action请求
然后点击Next然后点击Finish
(为什么这部分是红色字体呢?
因为我看SSH书的时候.内人直接就到下一步了.很容易忽略这几个字….)
首先做点准备工作了.准备好数据库和表.我用的是Oracle9i数据库.无论是9i或10G都是一样的配置.但是如果你用的是MySql或者SqlServer的话.你需要另行更改配置了.
然后点击进入.
点击空白区域.右键new一个DateBaseDriver
如果成功的话会显示
准备工作完成以后继续向工程里面添加String3.0
点击工程右键---》MyEclipse-AddSpringCapabilities我就不截图了…
我还是个菜鸟.我知道有些jar包没有.但是我看SSH书上说引用的这些.但是我怕缺少jar包的原因就没敢删…(内本书真的很垃圾..我在当当网买的--)
然后点击Next然后Finsh
然后添加hibernate3.3
添加方法点击工程右键---》MyEclipse-AddhibernateCapabilities我就不截图了…
选择默认就可以点击Next
选择把hibernate整合到Spring配置文件中….点击Next
把SessionFactory整合到Spring配置文件中….点击Next。
。
选择你要选择刚才准备好的数据源…
点击Next
选择不需要创建SessionFactory点击Finish
然后导入asm-3.2.jar(此jar包如果没有我发给你…)
此时SSH框架只差最后一步了。
。
。
就是创建持久化类,与配置文件.及其该持久化类的Dao这时候你想到了什么?
没错,hibernate反映射..返回到DateBaseDriver成功界面…
点击进入……
这个页面
点击Next
选择ID的生成方式…如果是Oracle数据库想跟Mysql一样想自增的话.那么可是使用PL/SQLDeveloper
自带的存储过程.然后在Userinfo.hbm.xml里面加入
如此怀念MySql哎….
然后点击NextFinsh…
同事创建2个包.
一个dao包…和一个action包。
把自动生成的UserinfoDAO转移到dao包里面.然后在action包里面创建一个UserinfoAction
如图所示
继续向Spring文件里面加入
将Dao对象注入到Action里面…继续在Struts2.1配置文件里面加入
然后在web.xml里面加入
由于小工程是在次强调只为面试所以忽略service层,忘各位谅解--.
添加成功
JSP代码…
<%@pagelanguage="java"import="java.util.*"pageEncoding="UTF-8"%>
<%
Stringpath=request.getContextPath();
%>
请输入你要添加的用户名:
请输入你要添加的密码:
Web.xml代码
xmlversion="1.0"encoding="UTF-8"?
>
xmlns="
xmlns:
xsi="http:
//www.w3.org/2001/XMLSchema-instance"
xsi:
schemaLocation="
index.jsp
contextConfigLocation
classpath:
applicationContext.xml
org.springframework.web.context.ContextLoaderListener
struts2
org.apache.struts2.dispatcher.ng.filter.StrutsPrepareAndExecuteFilter
struts2
*.action
Action代码
packagecom.cxc.action;
importcom.cxc.dao.UserinfoDAO;
importcom.cxc.model.Userinfo;
publicclassUserinfoAction{
privateUserinfoDAOuserinfodao;
privateStringusername;
privateStringpassword;
publicStringtext(){
Userinfouserinfo=newUserinfo();
userinfo.setUsername(this.getUsername());
userinfo.setPassword(this.getPassword());
this.getUserinfodao().save(userinfo);
return"success";
}
publicStringgetUsername(){
returnusername;
}
publicvoidsetUsername(Stringusername){
this.username=username;
}
publicStringgetPassword(){
returnpassword;
}
publicvoidsetPassword(Stringpassword){
this.password=password;
}
publicUserinfoDAOgetUserinfodao(){
returnuserinfodao;
}
publicvoidsetUserinfodao(UserinfoDAOuserinfodao){
this.userinfodao=userinfodao;
}
}
在次声明.如果有什么不对的地方:
敬请谅解….
 升级会员
升级会员 