SSH整合练习.docx
《SSH整合练习.docx》由会员分享,可在线阅读,更多相关《SSH整合练习.docx(22页珍藏版)》请在冰豆网上搜索。
SSH整合练习
开发Struts2、Hibernate、Spring集成程序
Myeclipse10.7下struts2.1spring3.1hibernate4.1整合图解
ssh整合遇到的问题很多,这里只对我自己遇到的问题进行一个详细的说明:
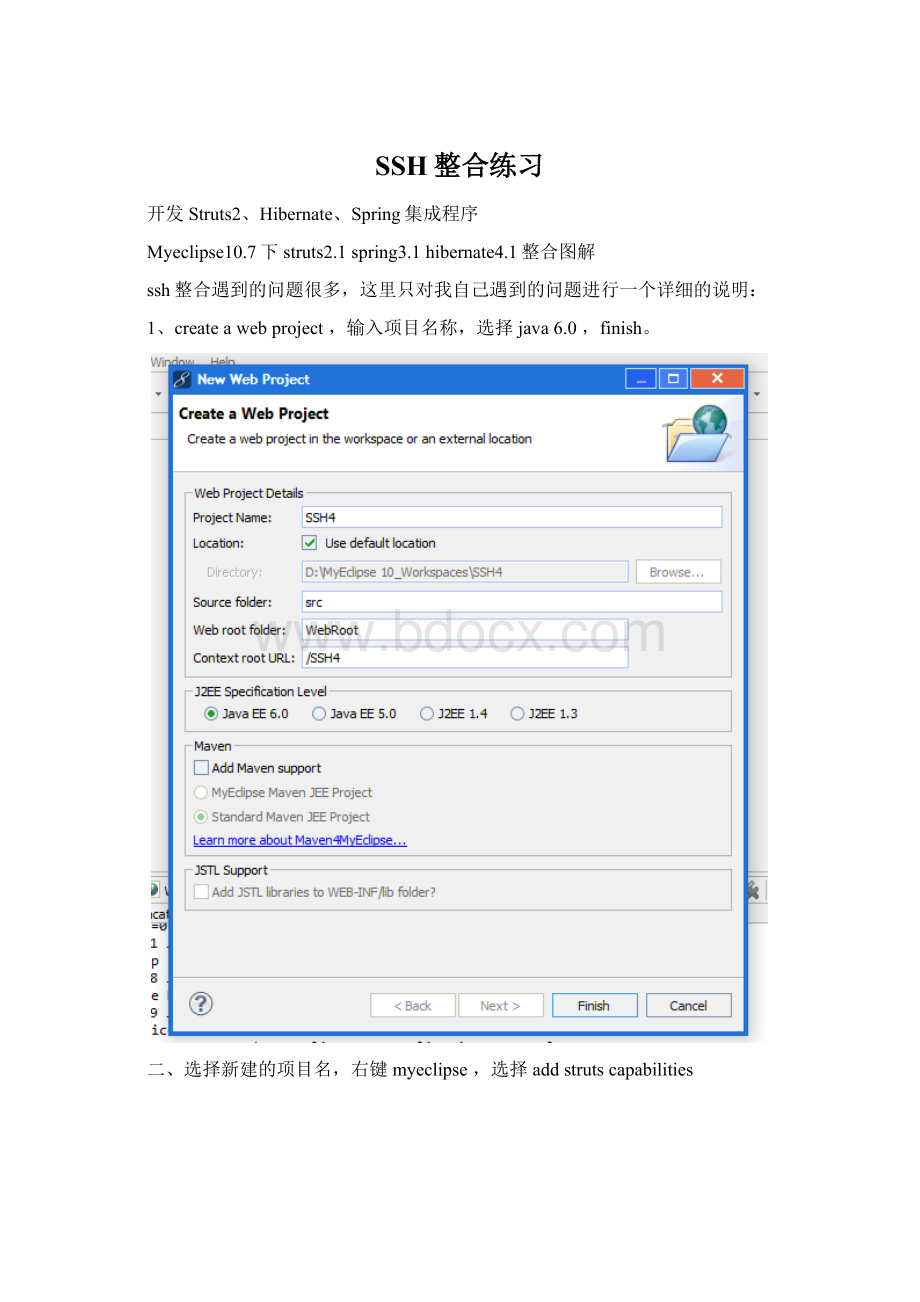
1、createawebproject,输入项目名称,选择java6.0,finish。
二、选择新建的项目名,右键myeclipse,选择addstrutscapabilities
选择struts2.1,并选择filtername默认只struts2,urlpattren为/*,点击next.
为新建的项目选择struts2libraries,如图所示
至此添加struts2完成
项目目录如下图
3、搭建spring
右键选择工程名,选择myeclipse,然后addspringcapabilities
选择spring3.1,并添加三个包,springcorelibraries,springpersistencelibraries和springweblibraries,JARLibraryInstallation里选择Copy到lib目录(避免发布到Tomcat时出问题)。
生成applicationContext.xml文件,Folder中选择WebRoot/WEB-INF,然后点击Finish。
至此搭建spring完成
4、搭建hibernate
选择项目工程名,右键myeclipse,addhibernatecapabilities
选择hibernate4.1,并选择两个包,拷贝到lib文件夹下面
选择使用spring管理hibernate
选择使用spring配置文件
这里进行数据库链接配置,我的数据库连接已经完成,所以就直接选择
不创建SessionFactory
至此ssh环境就搭建完成了
6、启动tomcat,进行测试环境是否成功
在web.xml中添加配置
org.springframework.web.context.ContextLoaderListener
contextConfigLocation
/WEB-INF/applicationContext.xml
在浏览器中测试结果
8、在此基础上进一步搭建扩展,开发一个简单的用户登陆程序
首先编辑index.jsp,如图所示
再分别新建error.jsp和welcome.jsp
error.jsp
welcome.jsp
添加反向工程
打开myeclipse的hibernateexplorerperspective,打开mysql数据库连接,选中用户user表,生成与数据库对应的java对象和映像文件
点击next,
选择id的生成方式native
Next->Finish。
创建loginaction
LoginAction.java
代码:
importjava.util.List;
importorg.hibernate.Query;
importorg.hibernate.Session;
importorg.hibernate.SessionFactory;
importcom.opensymphony.xwork2.*;
/**
*@authorAdministrator
*用户登录的action
*/
publicclassLoginActionextendsActionSupport{
privateStringusername;
privateStringpassword;
privateSessionFactorysessionFactory;
//privateStringmessage;
publicStringexecute()throwsException{
Sessionsession=sessionFactory.openSession();
Stringsql="fromUseruwhereu.username=?
andu.password=?
";
Queryquery=session.createQuery(sql);
query.setParameter(0,username);
query.setParameter(1,password);
Listuser=query.list();
session.close();
if(user.size()>0){
return"success";
}else{
return"error";
}
}
/**
*getandset方法
*@return
*/
publicStringgetUsername(){
returnusername;
}
publicvoidsetUsername(Stringusername){
this.username=username;
}
publicStringgetPassword(){
returnpassword;
}
publicvoidsetPassword(Stringpassword){
this.password=password;
}
publicSessionFactorygetSessionFactory(){
returnsessionFactory;
}
publicvoidsetSessionFactory(SessionFactorysessionFactory){
this.sessionFactory=sessionFactory;
}
}
配置struts.xml
xmlversion="1.0"encoding="UTF-8"?
>
DOCTYPEstrutsPUBLIC"-//ApacheSoftwareFoundation//DTDStrutsConfiguration2.1//EN""http:
//struts.apache.org/dtds/struts-2.1.dtd">
/welcome.jsp
/error.jsp
配置spring,ApplicationContext.xml。
xmlversion="1.0"encoding="UTF-8"?
>
xmlns="http:
//www.springframework.org/schema/beans"
xmlns:
xsi="http:
//www.w3.org/2001/XMLSchema-instance"
xmlns:
p="http:
//www.springframework.org/schema/p"
xsi:
schemaLocation="http:
//www.springframework.org/schema/beanshttp:
//www.springframework.org/schema/beans/spring-beans-3.1.xsd">
class="mons.dbcp.BasicDataSource">
value="com.mysql.jdbc.Driver">
mysql:
//localhost:
3306/test">
class="org.springframework.orm.hibernate4.LocalSessionFactoryBean">
org.hibernate.dialect.MySQLDialect
./User.hbm.xml
增加struts.properties
在src目录下,增加struts.properties,代码,struts.objectFactory=spring
或者在struts.xml中添加
9、将项目添加到tomcat中,启动tomcat,这时似乎一切进行的很顺利,但是会发现项目无法正常运行,这是由于在添加strutsspring和hibernate时候使用的是myeclipse自带的jar报,会出现包冲突的情况。
解决办法:
关掉tomcat,进入tomcat目录下的webapps目录,找到SSH项目所在,进入web-inf/lib目录下,找到名字相同版本不同的jar包,以保留高版本的原则进行删除
 升级会员
升级会员 