花哨的PARTY闪光的字体啊 PS教程.docx
《花哨的PARTY闪光的字体啊 PS教程.docx》由会员分享,可在线阅读,更多相关《花哨的PARTY闪光的字体啊 PS教程.docx(17页珍藏版)》请在冰豆网上搜索。
花哨的PARTY闪光的字体啊PS教程
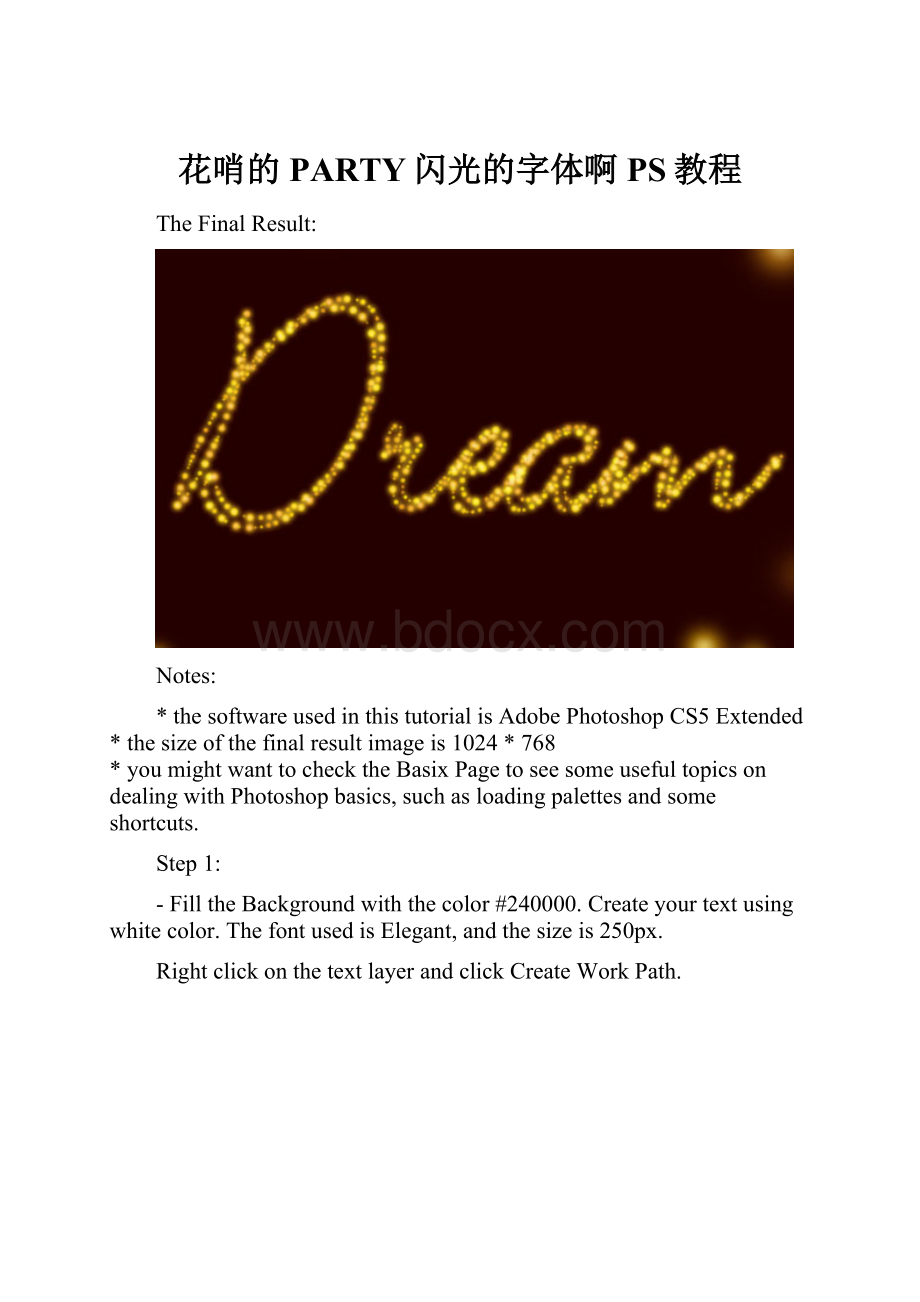
TheFinalResult:
Notes:
*thesoftwareusedinthistutorialisAdobePhotoshopCS5Extended
*thesizeofthefinalresultimageis1024*768
*youmightwanttochecktheBasixPagetoseesomeusefultopicsondealingwithPhotoshopbasics,suchasloadingpalettesandsomeshortcuts.
Step1:
-FilltheBackgroundwiththecolor#240000.Createyourtextusingwhitecolor.ThefontusedisElegant,andthesizeis250px.
RightclickonthetextlayerandclickCreateWorkPath.
-Createanewlayerandrenameitto“Stroke”,thenmakethetextlayerinvisiblebyclickingontheeyeiconnexttoit.SettheForegroundcolorto#e89819andtheBackgroundcolorto#fddd03.
Step2:
-Wearegoingtomodifythesettingsofthebrushusedtocreatethestroke.SoopentheBrushpanel(Window->Brush),andchooseahardbrush.ChangetheSizeto7pxandtheSpacingto150%.
-UnderShapeDynamics,changetheSizeJitterto100%.
-AndunderColorDynamics,changetheForeground/BackgroundJitterto100%aswell.Theothervaluesshouldbesetto0.
-Nowgobacktotheworkpath,grabtheDirectSelectiontool,rightclickonthepath,andclickStrokePath.ChooseBrushfromtheTooldropdownmenu,andmakesurethattheSimulatePressureboxisun-checked.
-HitEntertogetridofthepath,thisishowthestrokeshouldlooklike.
Step3:
-Duplicatethe“Stroke”layer,thenchangeits(theoriginalStrokelayer)BlendModetoPinLight.
-Makesurethattheoriginal“Stroke”layerisstillselected,andgotoFilter->Blur->GaussianBlur.ChangetheRadiusvalueto3.
-Youshouldgetaresultsimilartothis:
Step4:
Doubleclickonthe“Strokecopy”layertoapplythefollowingstyles:
-OuterGlow:
Changethecolorto#9f9f28,theSizeto6,theContourtoValley–HighandtheRangeto100.
-InnerGlow:
ChangetheSourcetoCenter.Thiswillmaketheglowemanatefromthecenterinsteadoftheinneredges,whichgivesareallycooleffect.Also,changetheSizeto4.
-Thestylesappliedshouldmakeyourtextglow.
Step5:
-It’stimetocreatetheBackgroundnow.Solet’sstartwiththebrushused:
-IntheBrushpanel(theBrushToolshouldbeselected),chooseabigsoftbrush.TheSizeshouldbesomethingaround70px,andtheSpacingabout150%.
-UnderShapeDynamics,changetheSizeJitterto100%.
-UnderScattering,changetheScatterto350%,theCountto3andtheCountJitterto35%.
-FortheColorDynamics,changetheForeground/BackgroundJitterto100%.Othervaluesshouldbesetto0.
-Finally,forTransfer,justchangetheOpacityJitterto100%.
Step6:
-CreateanewlayerunderbothStrokelayers,andrenameitto“BG”.TheForegroundandBackgroundcolorsshouldbethesameasinStep1.GrabtheEllipseTool,andclickthePathsbuttonintheoptionsbar,thiswillenableyoutodrawapathinsteadofafilledshape.
-Drawanellipsearoundthetext.Leaveenoughdistancebetweenthepathandthetexttoavoidoverlapping.
-Rightclickonthepath,clickStrokePath,chooseBrushandmakesuretheSimulatePressureboxisun-checked.
-HitEntertogetridofthepath.
-Doubleclickonthe“BG”layertoaddasimpleInnerGlow,justchangetheSourcetoCenter.
Youcanusethebrushtoaddmoresparklesifyouthinksomeareasarestillempty.Andthisisthefinalresult.
 升级会员
升级会员 