Android 面试题总结之Android 进阶二.docx
《Android 面试题总结之Android 进阶二.docx》由会员分享,可在线阅读,更多相关《Android 面试题总结之Android 进阶二.docx(37页珍藏版)》请在冰豆网上搜索。
Android面试题总结之Android进阶二
Android面试题总结之Android进阶
(二)
掌握
Window是什么?
View的绘制流程
View的事件分发机制
View与SurfaceView,GLSurfaceView
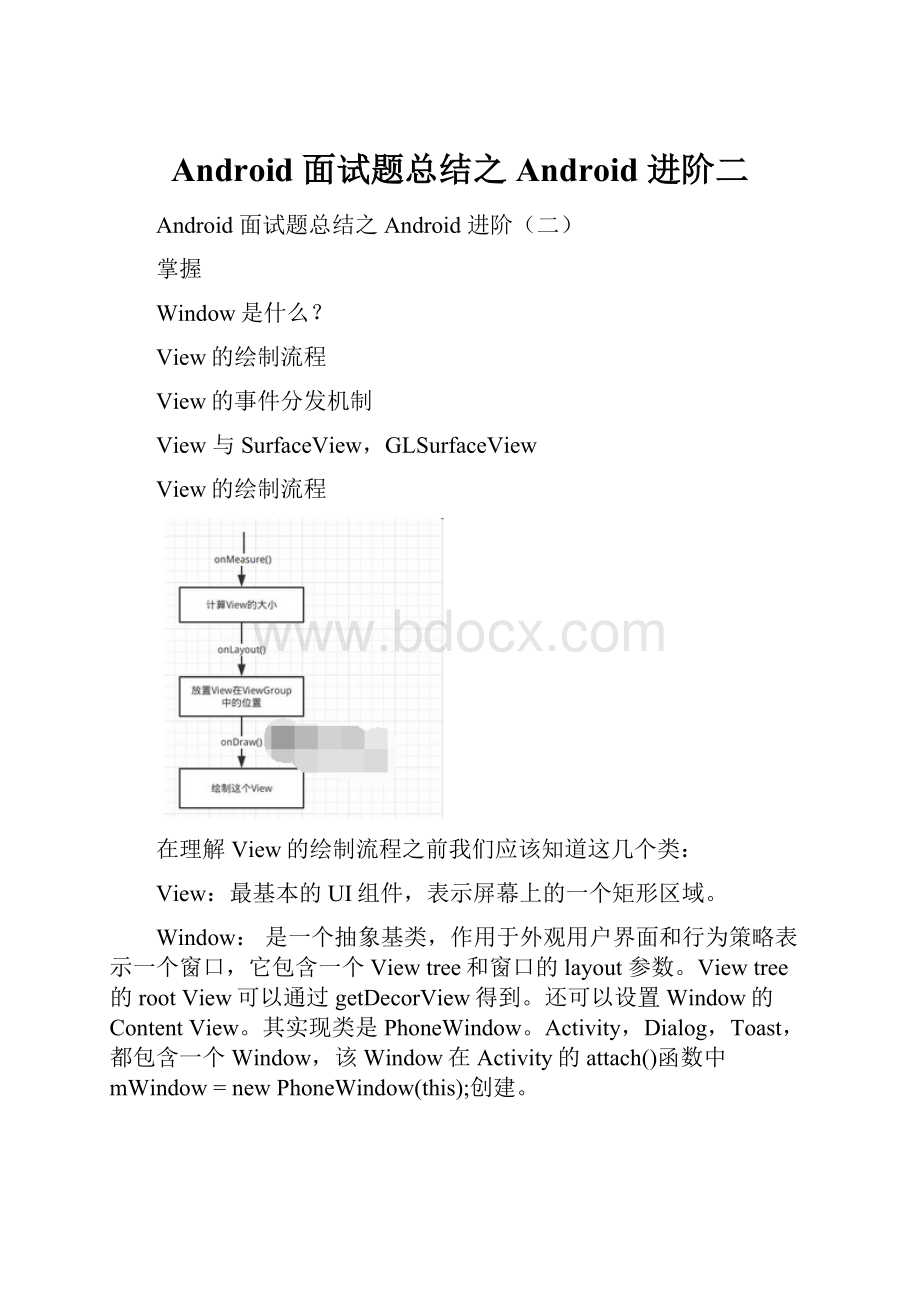
View的绘制流程
在理解View的绘制流程之前我们应该知道这几个类:
View:
最基本的UI组件,表示屏幕上的一个矩形区域。
Window:
是一个抽象基类,作用于外观用户界面和行为策略表示一个窗口,它包含一个Viewtree和窗口的layout参数。
Viewtree的rootView可以通过getDecorView得到。
还可以设置Window的ContentView。
其实现类是PhoneWindow。
Activity,Dialog,Toast,都包含一个Window,该Window在Activity的attach()函数中mWindow=newPhoneWindow(this);创建。
DecorView:
该类是PhoneWindow类的内部类,继承自FrameLayout,它是所有应用窗口的根View,PhoneWindow设置DecorView为应用窗口的根视图。
PhoneWindow:
PhoneWindow对象帮我们创建了一个PhoneWindow内部类DecorView(父类为FrameLayout)窗口顶层视图
ViewRootImpl:
ViewRootImpl是连接WindowManager与DecorView的纽带,View的整个绘制流程的三大步(measure、layout、draw)以及我们一些addView()的操作,都是通过ViewRootImpl完成的。
WindowManager:
应用程序界面和窗口管理器
在ActivityonCreate使用的setContentView()就是设置的ContentView,通过LayoutInflater将xml内容布局解析成View树形结构添加到DecorView顶层视图中id为content的FrameLayout父容器上面。
那么DecorView是如何绘制的呢?
我们分两个步骤来理解:
DecorView添加到Window的过程
DecorView的绘制过程
DecorView添加到Window的过程
我们根据下图步骤来解析DecorView添加到Window的过程,以便让我们更容易的理解。
**Activity初始化:
**Activity启动,关于Activity的创建过程啊或者其他细节,因为不是本篇幅重点故不做详细讨论。
我们尽量简化理解View的绘制流程。
PhoneWindow的创建:
Activity对象创建完成后,初始化了PhoneWindow对象,该Window在Activity的attach()函数中mWindow=newPhoneWindow(this);创建,相关代码块如下:
finalvoidattach(Contextcontext,ActivityThreadaThread..){
..........
mFragments.attachHost(null/*parent*/);
//创建PhoneWindow对象
mWindow=newPhoneWindow(this);
mWindow.setCallback(this);
mWindow.setOnWindowDismissedCallback(this);
mWindow.getLayoutInflater().setPrivateFactory(this);
..........
}
DecorView添加Window:
ActivityThread.Java类会调用handleResumeActivity方法将顶层视图DecorView添加到PhoneWindow窗口,因此通过PhoneWindow的setContentView将Activity与Window进行关联了。
finalvoidhandleResumeActivity(IBindertoken,
booleanclearHide,booleanisForward,booleanreallyResume){
//获得当前Activity的PhoneWindow对象
r.window=r.activity.getWindow();
//获得当前PhoneWindow内部类DecorView对象
Viewdecor=r.window.getDecorView();
//设置DecorView为可见
decor.setVisibility(View.INVISIBLE);
//获取Activity的WindowManager
ViewManagerwm=a.getWindowManager();
WindowManager.LayoutParamsl=r.window.getAttributes();
a.mDecor=decor;
l.type=WindowManager.LayoutParams.TYPE_BASE_APPLICATION;
l.softInputMode|=forwardBit;
if(a.mVisibleFromClient){
//标记已添加至Window
a.mWindowAdded=true;
//添加DecorView到Window
wm.addView(decor,l);
}
}
接着DecorView通过WindowManager设置到ViewRootImpl中,然后就是下面DecorView的绘制流程了。
因此我们知道在Activity的onCreate和onResume方法中调用View.getWidth()和View.getMeasuredHeight()返回值是0,因为View还没有开始绘制。
View的绘制过程
ViewRootImpl是连接WindowManager与DecorView的纽带,View的整个绘制流程的三大步(measure、layout、draw)都是通过ViewRootImpl完成的,
绘制是从根节点开始,对布局树进行measure和draw。
整个View树的绘图流程在ViewRootImpl.java类的performTraversals()函数展开,该函数所做的工作可简单概括为是否需要重新计算视图大小(measure)、是否需要重新安置视图的位置(layout)、以及是否需要重绘(draw),结合DecorView添加至Window过程,整体大概的流程图如下:
那么我们围绕图上过程来分析View的绘制流程,首先我们进入ViewRootImpl.java中,查看performTraversals函数,这个函数非常长,View的绘制三大流程将在此展开。
“`privatevoidperformTraversals(){
//缓存DecorView,因为在下面用的比较多
finalViewhost=mView;
…..
if(measureAgain){
if(DEBUG_LAYOUT)Log.v(TAG,
“Andheylet’smeasureoncemore:
width=”+width
+”height=”+height);
performMeasure(childWidthMeasureSpec,childHeightMeasureSpec);
}
…..
//获得view宽高的测量规格,mWidth和mHeight表示窗口的宽高,lp.width和lp.height表示DecorView根布局宽和高
intchildWidthMeasureSpec=getRootMeasureSpec(mWidth,lp.width);
intchildHeightMeasureSpec=getRootMeasureSpec(mHeight,lp.height);
//执行测量操作
performMeasure(childWidthMeasureSpec,childHeightMeasureSpec);
.....
//执行布局操作
performLayout(lp,desiredWindowWidth,desiredWindowHeight);
......
//执行绘制操作
performDraw();
}
“`
主要分下面三大步骤。
measure
measure操作主要用于计算视图的大小
我们知道View的MeasureSpec由父容器的MeasureSpec和其自身的LayoutParams共同确定,而对于DecorView是由它的MeasureSpec由窗口尺寸和其自身的LayoutParams共同确定。
在ViewRootImpl的performTraversals方法中,完成了创建DecorView的MeasureSpec的过程,相应的代码片段如下:
//获得view宽高的测量规格,mWidth和mHeight表示窗口的宽高,lp.width和lp.height表示DecorView根布局宽和高
intchildWidthMeasureSpec=getRootMeasureSpec(mWidth,lp.width);
intchildHeightMeasureSpec=getRootMeasureSpec(mHeight,lp.height);
我们知道Activity的根视图总是全屏的,因为ViewRootImpl在创建DecorView的MeasureSpec的过程测量模式是EXACTLY,而Size是windowSize,相应的代码片段如下:
privatestaticintgetRootMeasureSpec(intwindowSize,introotDimension){
intmeasureSpec;
switch(rootDimension){
//匹配父容器时,测量模式为MeasureSpec.EXACTLY,测量大小直接为屏幕的大小,也就是充满真个屏幕
caseViewGroup.LayoutParams.MATCH_PARENT:
//Windowcan'tresize.ForcerootviewtobewindowSize.
measureSpec=MeasureSpec.makeMeasureSpec(windowSize,MeasureSpec.EXACTLY);
break;
......
}
returnmeasureSpec;
}
View的measure过程
measure在performMeasure开始的,该函数在view中定义为final类型,要求子类不能修改。
measure()函数中又会调用onMeasure()函数,相应的代码片段如下:
publicfinalvoidmeasure(intwidthMeasureSpec,intheightMeasureSpec){
...........
//如果上一次的测量规格和这次不一样,重新测量视图View的大小
if((mPrivateFlags&PFLAG_FORCE_LAYOUT)==PFLAG_FORCE_LAYOUT||
widthMeasureSpec!
=mOldWidthMeasureSpec||
heightMeasureSpec!
=mOldHeightMeasureSpec){
//firstclearsthemeasureddimensionflag
mPrivateFlags&=~PFLAG_MEASURED_DIMENSION_SET;
resolveRtlPropertiesIfNeeded();
intcacheIndex=(mPrivateFlags&PFLAG_FORCE_LAYOUT)==PFLAG_FORCE_LAYOUT?
-1:
mMeasureCache.indexOfKey(key);
if(cacheIndex<0||sIgnoreMeasureCache){
//measureourselves,thisshouldsetthemeasureddimensionflagback
onMeasure(widthMeasureSpec,heightMeasureSpec);
mPrivateFlags3&=~PFLAG3_MEASURE_NEEDED_BEFORE_LAYOUT;
}else{
longvalue=mMeasureCache.valueAt(cacheIndex);
//Castingalongtointdropsthehigh32bits,nomaskneeded
setMeasuredDimensionRaw((int)(value>>32),(int)value);
mPrivateFlags3|=PFLAG3_MEASURE_NEEDED_BEFORE_LAYOUT;
}...........
}
实际为整个Viewtree计算大小是onMeasure()函数,里面直接调用setMeasuredDimension()提供一个默认模式View计算大小,相应的代码片段如下:
protectedvoidonMeasure(intwidthMeasureSpec,intheightMeasureSpec){
setMeasuredDimension(getDefaultSize(getSuggestedMinimumWidth(),widthMeasureSpec),getDefaultSize(getSuggestedMinimumHeight(),heightMeasureSpec));
}
其中默认使用getDefaultSize()获取默认尺寸大小,如果自定义View不重写onMesure(),在布局中使用wrap_content就相当于使用match_parent的效果相应的代码片段如下:
publicstaticintgetDefaultSize(intsize,intmeasureSpec){
intresult=size;
//获得测量模式
intspecMode=MeasureSpec.getMode(measureSpec);
//获得父亲容器留给子视图View的大小
intspecSize=MeasureSpec.getSize(measureSpec);
switch(specMode){
caseMeasureSpec.UNSPECIFIED:
result=size;
break;
caseMeasureSpec.AT_MOST:
caseMeasureSpec.EXACTLY:
result=specSize;
break;
}
returnresult;
}
普通View的measure()函数是由ViewGroup在measureChild方法中调用的,ViewGroup调用其子View的measure时即传入了该子View的widthMeasureSpec和heightMeasureSpec,共同决定了View的大小。
而DecorView是继承自FrameLayout的,所以我们看下面ViewGroup的measure过程。
ViewGroup的measure过程
ViewGroup需要先完成子View的measure过程,才能完成自身的measure过程,在ViewGroup的onMeasure()函数中,不同的布局(LinearLayout、RelativeLayout、FrameLayout等等)有不同的实现。
FrameLayout的onMeasure()方法代码如下:
protectedvoidonMeasure(intwidthMeasureSpec,intheightMeasureSpec){
//获取子View的个数
intcount=getChildCount();
finalbooleanmeasureMatchParentChildren=
MeasureSpec.getMode(widthMeasureSpec)!
=MeasureSpec.EXACTLY||
MeasureSpec.getMode(heightMeasureSpec)!
=MeasureSpec.EXACTLY;
mMatchParentChildren.clear();
intmaxHeight=0;
intmaxWidth=0;
intchildState=0;
for(inti=0;ifinalViewchild=getChildAt(i);
if(mMeasureAllChildren||child.getVisibility()!
=GONE){
//测量FrameLayout下每个子视图View的宽和高
measureChildWithMargins(child,widthMeasureSpec,0,heightMeasureSpec,0);
finalLayoutParamslp=(LayoutParams)child.getLayoutParams();
maxWidth=Math.max(maxWidth,
child.getMeasuredWidth()+lp.leftMargin+lp.rightMargin);
maxHeight=Math.max(maxHeight,
child.getMeasuredHeight()+lp.topMargin+lp.bottomMargin);
childState=combineMeasuredStates(childState,child.getMeasuredState());
if(measureMatchParentChildren){
if(lp.width==LayoutParams.MATCH_PARENT||
lp.height==LayoutParams.MATCH_PARENT){
mMatchParentChildren.add(child);
}
}
}
}
.............
}
至此View的measure过程大致清楚了,下面是View的layout过程。
layout
layout在view中定义为final类型,要求子类不能修改,用于设置子View的位置,因而是由父容器获取子View的位置参数后,调用child.layout方法并传入已获取的位置参数,从而完成对子View的layout。
相应的代码片段如下:
publicvoidlayout(intl,intt,intr,intb){
//判断是否需要重新测量
if((mPrivateFlags3&PFLAG3_MEASURE_NEEDED_BEFORE_LAYOUT)!
=0){
onMeasure(mOldWidthMeasureSpec,mOldHeightMeasureSpec);
mPrivateFlags3&=~PFLAG3_MEASURE_NEEDED_BEFORE_LAYOUT;
}
intoldL=mLeft;
intoldT=mTop;
intoldB=mBottom;
intoldR=mRight;
booleanchanged=isLayoutModeOptical(mParent)?
setOpticalFrame(l,t,r,b):
setFrame(l,t,r,b);
//判断布局是否发生改变,重新布局
if(changed||(mPrivateFlags&PFLAG_LAYOUT_REQUIRED)==PFLAG_LAYOUT_REQUIRED){
//回调onLayout的方法,该方法由ViewGroup实现
onLayout(changed,l,t,r,b);
mPrivateFlags&=~PFLAG_LAYOUT_REQUIRED;
ListenerInfoli=mListenerInfo;
if(li!
=null&&li.mOnLayoutChangeListeners!
=null){
ArrayListlistenersCopy=
(ArrayList)li.mOnLayoutChangeListeners.clone();
intnumListeners=listenersCopy.size();
for(inti=0;ilistenersCopy.get(i).onLayoutChange(this,l,t,r,b,oldL,oldT,oldR,oldB);
}
}
}
mPrivateFlags&=~PFLAG_FORCE_LAYOUT;
mPrivateFlags3|=PFLAG3_IS_LAID_OUT;
}
通过上面代码我们知道layout主要完成两个操作:
setFrame(l,t,r,b),l,t,r,b即子视图在父视图中的具体位置,该函数用于将这些参数保存起来,onLayout()是空方法由ViewGroup实现,在ViewGroup中,onLayout是一个抽象方法,因为对于不同的布局管理器类,对子元素的布局方式是不同的。
而DecorView是继承自FrameLayout的,所以我们看下面DecorView的onLayout代码片段:
@Override
protectedvoidonLayout(booleanchanged,intleft,inttop,intright,intbottom){
layoutChildren(left,top,right,bottom,false/*noforceleftgravity*/);
}
voidlayoutChildren(intleft,inttop,intright,intbottom,
boolean
 升级会员
升级会员 