Intouch 怎样用DASSIDirect with Siemens S7200 PLC 通讯.docx
《Intouch 怎样用DASSIDirect with Siemens S7200 PLC 通讯.docx》由会员分享,可在线阅读,更多相关《Intouch 怎样用DASSIDirect with Siemens S7200 PLC 通讯.docx(12页珍藏版)》请在冰豆网上搜索。
Intouch怎样用DASSIDirectwithSiemensS7200PLC通讯
ConfiguretheS7-200PLC
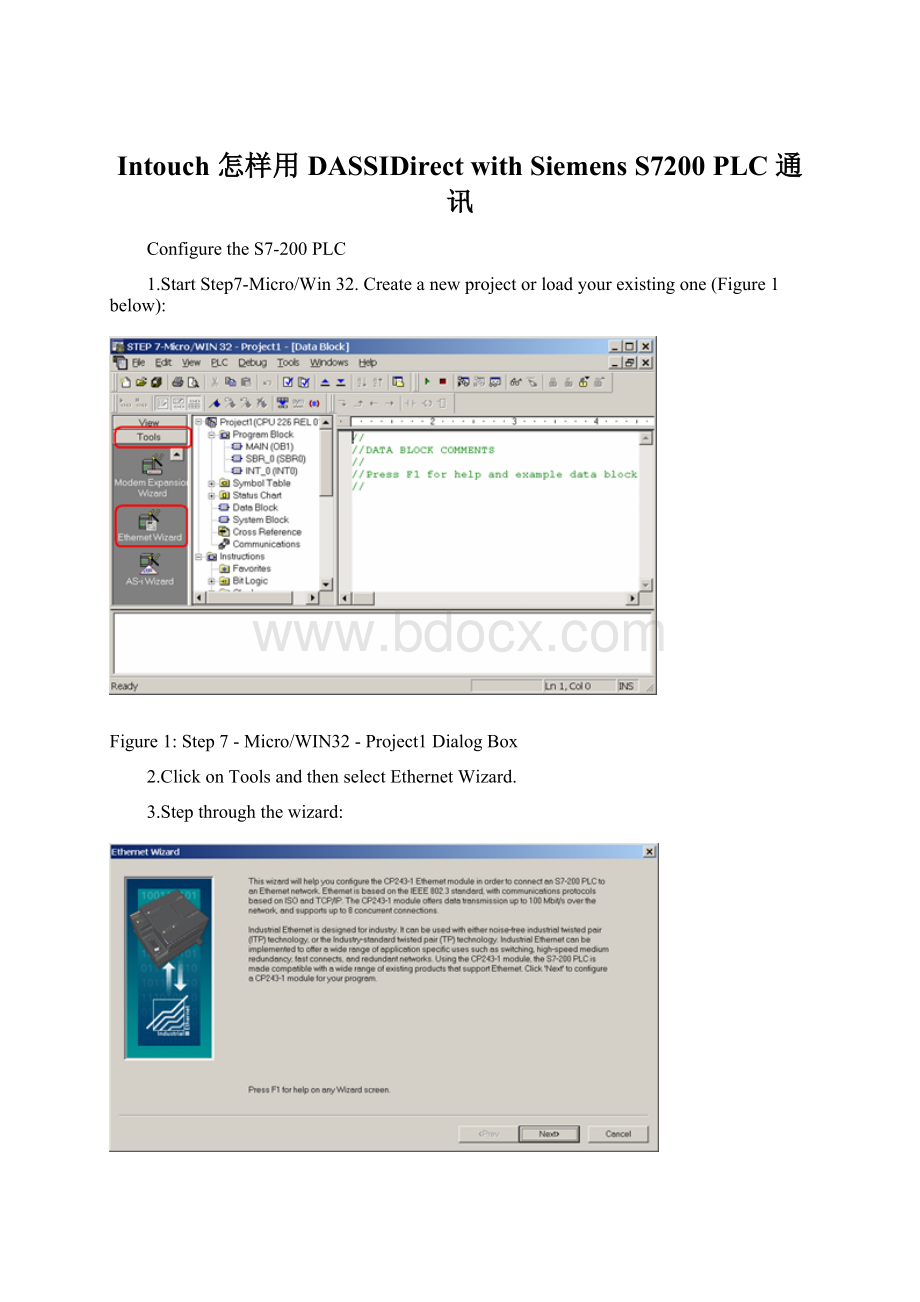
1.StartStep7-Micro/Win32.Createanewprojectorloadyourexistingone(Figure1below):
Figure1:
Step7-Micro/WIN32-Project1DialogBox
2.ClickonToolsandthenselectEthernetWizard.
3.Stepthroughthewizard:
Figure2:
EthernetWizard
4.ClickYeswhenaskedtousesymbolicaddressing.Otherwisethewizardcannotcontinue:
Figure3:
ClickYes
5.EnterthemodulepositionoftheCP243-1.
Ifyouareuncertainabouttheposition,clickthebuttonReadModules.Otherwiseyoucanenterthenumberdirectly:
Figure4:
SpecifyModulePositionDialogBox
6.EntertheIPconfigurationofyourCP243-1.
Especiallyduringthestartupphaseoftheproject,IwouldrecommendnottouseaBOOTPserver.
Letthemoduledetecttheconnectiontype(Figure5below):
Figure5:
ModuleAddressConfiguration
7.EnterthenumbersofconnectionsyouwanttoconfigurefortheCP243-1.
Defaultvalueis0,whichwouldnotallowcommunication.InthisexampleIwilluse2connections(Figure6below):
Figure6:
2Connections
Nowyouhavetoconfiguretheconnections.Connection0(Figure7below)willacceptallincomingclientrequests:
Figure7:
ConnectionConfiguration
8.AlwaysselectThisisaServerConnection.IrecommendusingthedefaultTSAP'sassuggestedbyStep7-Micro/Win32.
9.ClickNextConnection(orPrev.Connectionifavailable)tostepthroughalltheconnectionstoconfigurethem.
Note:
Ifyouplantousesuchaconnection,besurethatonlyoneclienttriestoconnecttothePLCviathisconnectionatthesametime.Allotherconnectiontrieswillberejected.
Connection1acceptsonlyrequestsfromthespecifiedclient:
Figure8:
SpecifiedClientRequests
10.IfallconnectionsareconfiguredclickOK.
DuringthestartupphaseofaprojectIwouldrecommendnottouseaCRCprotection:
Figure9:
NoCRCProtection
ThewizardnowneedsarangeintheV-Memorywheretostorethisinformation.Step7-Micro/Win32willsuggestavalidrange.
11.ClickonSuggestAddressifyouhaveplannedtousethisrangeforsomethingelse.
InthiscaseStep7-Micro/Win32willsuggestanotherfreerangethathasthecorrectsizetoholdthisdata:
Figure10:
StoreMemoryAllocationforAddress
12.ClickNext.
Theprogramnowhasenoughinformation:
Figure11:
GenerateProjectComponents
13.ClickFinishtocompletetheconfiguration:
Figure12:
CompletetheWizardConfiguration
14.ClickYes.
InStep7-Micro/Win32youshouldnowseesomethinglikethefollowingfigure:
Figure13:
Step7_Micro/Win32Window
Step7-Micro/Win32hascreatedsomenewentriesintheV-Memory,startingattheaddressasspecifiedduringthesetupoftheCP243-1.
15.DownloadtheconfigurationtothePLC:
Figure14:
DownloadtheConfiguration
16.SelectalloptionsandclickOK(Figure15below):
Figure15:
DownloadOptions
17.SetthePLCtoSTOPmodeinordertobeabletodownloadanewconfiguration:
Figure16:
PLCSTOPMode
18.Afterthedownloaddon'tforgettosetthePLCtoRUNmodeagain.Thiswillnotbedoneautomatically:
Figure17:
PLCRUNMode
ThePLCsideisnowconfigured.
ConfiguretheDAServer
ConfigurationoftheDAServerisquiteeasy.
SincewehavecreatedtwoconnectionsinthePLC,wewillalsocreatetwoconnectionsinDASSIDirectDAServer.
Connection0willcorrespondtotheconnectionas
Figure18:
DASSIDirectConnection0
TheRemoteTSAPinDASSIDirectmustbetheLocalTSAPinthePLCconfiguration,andviceversa.
Connection1showninFigure19(below)willcorrespondtotheconnectionascreatedin
Figure19:
DASSIDirectConnection1
Nowcreateyourdevicegroup(s),ifnecessary.
ForaDDE/SuiteLinkconnectionyouneedtohaveatleastonedevicegroupperconnection,forOPCitisnotnecessary.Fortotestthecommunicationasdescribedbelow,pleaseenteradevicegroupcalledS7200.
TheconnectionbetweenDASSIDirectandtheS7-200PLCshouldnowbereadytotest.
TesttheCommunication
InpreviousTechNotesweusedwwclientfortesting.ThistoolwillnolongerbeinstalledwheninstallingArchestrA(A²)productslikeInTouch8.0oranyDAServer.IfyouhaveInTouch7.11installedyouwillfindthistoolunderProgramFiles/WonderwareFactorySuite/Commonandyoucanusethistool.
1.CreateasimpleInTouchapplicationwithonetag.
2.SelectSpecial/AccessNamesfromthemainmenu.
3.SelectAdd.
TheAddAccessNamedialogboxappears:
Figure21:
AddAccessName
4.EnterameaningfulnameintheAccessfield.
5.LeavetheNodeNameblankifyouhaveInTouchandDASSIDirectonthesamenode.
OtherwiseenterthenodenameofthePCwhereDASSIDirectresides.
TheTopicNamemustmatchtheDeviceGroupnameasconfiguredinDASSIDirect.
6.SelectSpecial/TagnameDictionaryandselectNew.
Figure22:
NewTagname
7.SelectType:
I/OIntegerandtheaccessnameascreatedintheprevioussteps.
8.UsetheitemMB1becauseitalwaysexistsinallS7-200PLCs.
Usethistaginthewindowyoujustcreated.
9.ActivateDASSIDirectintheSystemManagementConsole(SMC).
10.StartWindowViewer™.
11.OpentheDiagnosticintheSMCtoverifythecommunication:
Figure23:
CheckCommunicationfromtheSMC
IfyouseeaTimevaluethatischanging,andaClientQualityof00C0,yourcommunicationisfine.
 升级会员
升级会员 