实验三操作步骤.docx
《实验三操作步骤.docx》由会员分享,可在线阅读,更多相关《实验三操作步骤.docx(23页珍藏版)》请在冰豆网上搜索。
实验三操作步骤
实验三
(一)图层符号选择器的实现1
摘要:
我们要实现的是图层符号选择器,与ArcMap中的SymbolSelector的类似。
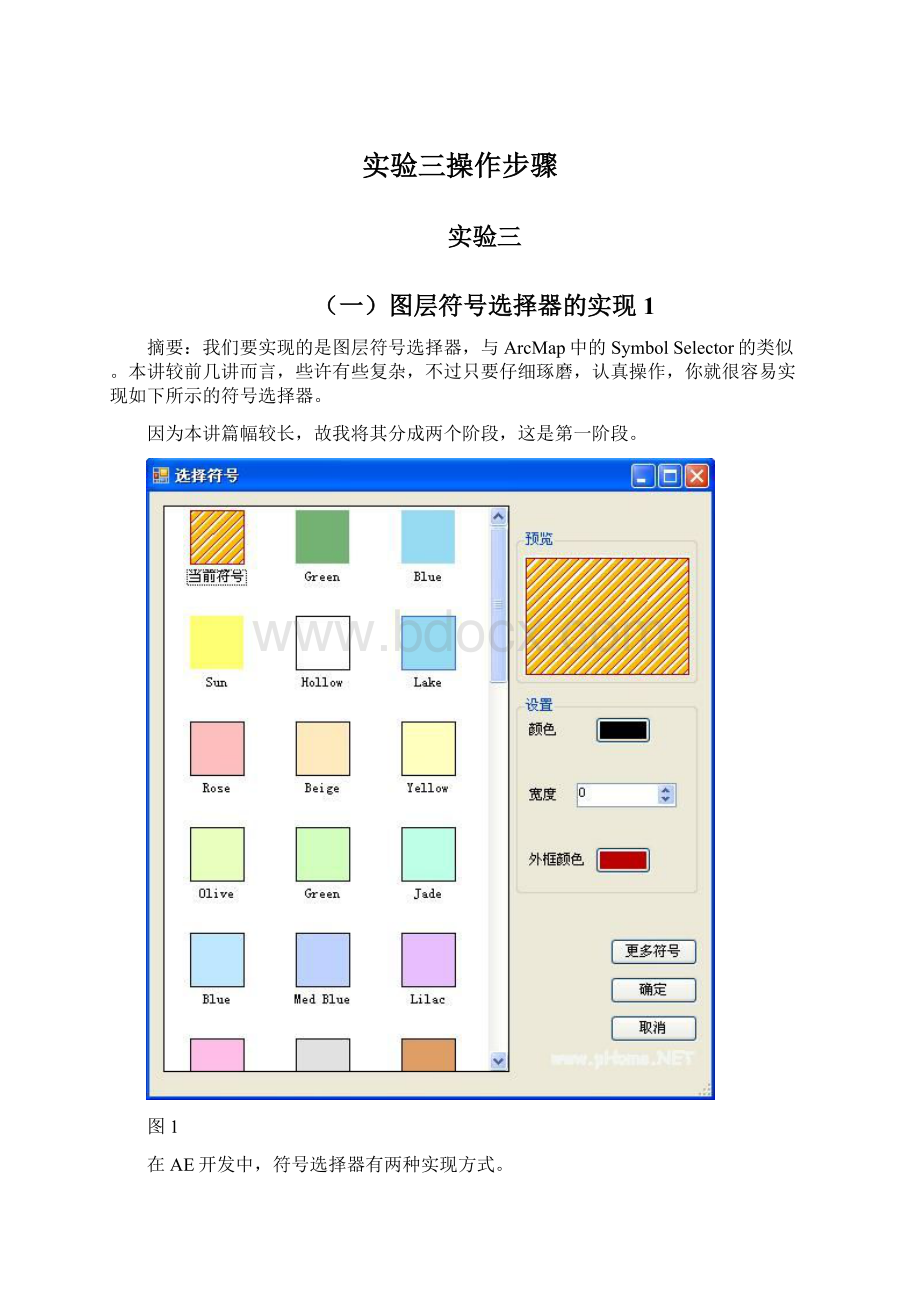
本讲较前几讲而言,些许有些复杂,不过只要仔细琢磨,认真操作,你就很容易实现如下所示的符号选择器。
因为本讲篇幅较长,故我将其分成两个阶段,这是第一阶段。
图1
在AE开发中,符号选择器有两种实现方式。
一是在程序中直接调用ArcMap中的符号选择器,如下所示:
图2
二是自定义符号选择器,如图1所示。
由于第一种方式前提是必须安装ArcGISDesktop,其界面还是英文的,而对二次开发来说,大部分用户希望应该是中文界面。
因此开发人员通常选择第二种方式,本讲也着重讲解第二种方式。
自定义符号选择器
AE9.3提供了SymbologyControl控件,极大的方便了图层符号选择器的制作。
本讲实现的符号选择器有如下功能。
用户双击TOCControl控件中图层的符号时,弹出选择符号对话框,对话框能够根据图层类型自动加载相应的符号,如点、线、面。
用户可以调整符号的颜色、线宽、角度等参数。
还可以打开自定义的符号文件(*.ServerStyle),加载更多的符号。
1新建符号选择器窗体
新建Winodws窗体,命名为SymbolSelectorFrm,修改窗体的Text属性为“选择符号”。
并添加SymbologyControl、GroupBox、PictureBox、Button、Label、NumericUpDown、ColorDialog、Open、ContextMenuStrip控件。
控件布局如下所示:
AE9.2提供了SymbologyControl控件,极大的方便了图层符号选择器的制作。
本讲实现的符号选择器有如下功能。
用户双击TOCControl控件中图层的符号时,弹出选择符号对话框,对话框能够根据图层类型自动加载相应的符号,如点、线、面。
用户可以调整符号的颜色、线宽、角度等参数。
还可以打开自定义的符号文件(*.ServerStyle),加载更多的符号。
图3
2设置控件属性
设置相应控件的相关属性,如下表所示(空则不用修改):
控件
Name属性
Text属性
其它
SymbologyControl
axSymbologyControl
PictureBox
ptbPreview
Label
lblColor
颜色
Label
lblSize
大小
Label
lblWidth
线宽
Label
lblAngle
角度
Label
lblOutlineColor
外框颜色
NumericUpDown
nudSize
NumericUpDown
nudWidth
NumericUpDown
nudAngle
Button
btnColor
(设置为空)
Button
btnOutlineColor
(设置为空)
Button
btnMoreSymbols
更多符号
Button
btnOK
确定
DialogResult属性设为OK
Button
btnCancel
取消
GroupBox
groupBox1
预览
GroupBox
groupBox2
设置
ColorDialog
colorDialog
Open
open
Filter属性设置为:
Styles文件|*.ServerStyle
ContextMenuStrip
contextMenuStripMoreSymbol
3添加引用
在解决方案资源管理器中添加ArcGISEngine的ESRI.ArcGIS.Geodatabase引用,在SymbolSelectorFrm.cs文件中添加如下引用代码:
usingESRI.ArcGIS.Carto;
usingESRI.ArcGIS.Display;
usingESRI.ArcGIS.esriSystem;
usingESRI.ArcGIS.SystemUI;
usingESRI.ArcGIS.Controls;
usingESRI.ArcGIS.Geodatabase;
4初始化
(1)添加SymbolSelectorFrm的全局变量,代码如下:
privateIStyleGalleryItempStyleGalleryItem;
privateILegendClasspLegendClass;
privateILayerpLayer;
publicISymbolpSymbol;
publicImagepSymbolImage;
(2)修改SymbolSelectorFrm的构造函数,传入图层和图例接口。
代码如下:
///
///构造函数,初始化全局变量
///
///TOC图例
///图层
publicSymbolSelectorFrm(ILegendClasstempLegendClass,ILayertempLayer)
{
InitializeComponent();
this.pLegendClass=tempLegendClass;
this.pLayer=tempLayer;
}
(3)添加SymbolControl的SymbologyStyleClass设置函数SetFeatureClassStyle(),代码如下:
///
///初始化SymbologyControl的StyleClass,图层如果已有符号,则把符号添加到SymbologyControl中的第一个符号,并选中
///
///
privatevoidSetFeatureClassStyle(esriSymbologyStyleClasssymbologyStyleClass)
{
this.axSymbologyControl.StyleClass=symbologyStyleClass;
ISymbologyStyleClasspSymbologyStyleClass=this.axSymbologyControl.GetStyleClass(symbologyStyleClass);
if(this.pLegendClass!
=null)
{
IStyleGalleryItemcurrentStyleGalleryItem=newServerStyleGalleryItem();
currentStyleGalleryItem.Name="当前符号";
currentStyleGalleryItem.Item=pLegendClass.Symbol;
pSymbologyStyleClass.AddItem(currentStyleGalleryItem,0);
this.pStyleGalleryItem=currentStyleGalleryItem;
}
pSymbologyStyleClass.SelectItem(0);
}
(4)添加注册表读取函数ReadRegistry(),此函数从注册表中读取ArcGIS的安装路径,代码如下:
///
///从注册表中取得指定软件的路径
///
///
///
privatestringReadRegistry(stringsKey)
{
//Openthesubkeyforreading
Microsoft.Win32.RegistryKeyrk=Microsoft.Win32.Registry.LocalMachine.OpenSubKey(sKey,true);
if(rk==null)return"";
//Getthedatafromaspecifiediteminthekey.
return(string)rk.GetValue("InstallDir");
}
(5)添加SymbolSelectorFrm的Load事件。
根据图层类型为SymbologyControl导入相应的符号样式文件,如点、线、面,并设置控件的可视性。
代码如下:
privatevoidSymbolSelectorFrm_Load(objectsender,EventArgse)
{
//取得ArcGIS安装路径
stringsInstall=ReadRegistry("SOFTWARE\\ESRI\\CoreRuntime");
//载入ESRI.ServerStyle文件到SymbologyControl
this.axSymbologyControl.LoadStyle+"\\Styles\\ESRI.ServerStyle");
//确定图层的类型(点线面),设置好SymbologyControl的StyleClass,设置好各控件的可见性(visible)
IGeoFeatureLayerpGeoFeatureLayer=(IGeoFeatureLayer)pLayer;
switch(((IFeatureLayer)pLayer).FeatureClass.ShapeType)
{
caseESRI.ArcGIS.Geometry.esriGeometryType.esriGeometryPoint:
this.SetFeatureClassStyle(esriSymbologyStyleClass.esriStyleClassMarkerSymbols);
this.lblAngle.Visible=true;
this.nudAngle.Visible=true;
this.lblSize.Visible=true;
this.nudSize.Visible=true;
this.lblWidth.Visible=false;
this.nudWidth.Visible=false;
this.lblOutlineColor.Visible=false;
this.btnOutlineColor.Visible=false;
break;
caseESRI.ArcGIS.Geometry.esriGeometryType.esriGeometryPolyline:
this.SetFeatureClassStyle(esriSymbologyStyleClass.esriStyleClassLineSymbols);
this.lblAngle.Visible=false;
this.nudAngle.Visible=false;
this.lblSize.Visible=false;
this.nudSize.Visible=false;
this.lblWidth.Visible=true;
this.nudWidth.Visible=true;
this.lblOutlineColor.Visible=false;
this.btnOutlineColor.Visible=false;
break;
caseESRI.ArcGIS.Geometry.esriGeometryType.esriGeometryPolygon:
this.SetFeatureClassStyle(esriSymbologyStyleClass.esriStyleClassFillSymbols);
this.lblAngle.Visible=false;
this.nudAngle.Visible=false;
this.lblSize.Visible=false;
this.nudSize.Visible=false;
this.lblWidth.Visible=true;
this.nudWidth.Visible=true;
this.lblOutlineColor.Visible=true;
this.btnOutlineColor.Visible=true;
break;
caseESRI.ArcGIS.Geometry.esriGeometryType.esriGeometryMultiPatch:
this.SetFeatureClassStyle(esriSymbologyStyleClass.esriStyleClassFillSymbols);
this.lblAngle.Visible=false;
this.nudAngle.Visible=false;
this.lblSize.Visible=false;
this.nudSize.Visible=false;
this.lblWidth.Visible=true;
this.nudWidth.Visible=true;
this.lblOutlineColor.Visible=true;
this.btnOutlineColor.Visible=true;
break;
default:
this.Close();
break;
}
}
(6)双击确定按钮和取消按钮,分别添加如下代码:
///
///确定按钮
///
///
///
privatevoidbtnOK_Click(objectsender,EventArgse)
{
//取得选定的符号
this.pSymbol=(ISymbol)pStyleGalleryItem.Item;
//更新预览图像
this.pSymbolImage=this.ptbPreview.Image;
//关闭窗体
this.Close();
}
///
///取消按钮
///
///
///
privatevoidbtnCancel_Click(objectsender,EventArgse)
{
this.Close();
}
(7)为了操作上的方便,我们添加SymbologyControl的DoubleClick事件,当双击符号时同按下确定按钮一样,选定符号并关闭符号选择器窗体。
代码如下:
///
///双击符号同单击确定按钮,关闭符号选择器。
///
///
///
privatevoidaxSymbologyControl_OnDoubleClick(objectsender,ESRI.ArcGIS.Controls.ISymbologyControlEvents_OnDoubleClickEvente)
{
this.btnOK.PerformClick();
}
(8)再添加符号预览函数,当用户选定某一符号时,符号可以显示在PictureBox控件中,方便预览,函数代码如下:
///
///把选中并设置好的符号在picturebox控件中预览
///
privatevoidPreviewImage()
{
stdole.IPictureDisppicture=this.axSymbologyControl.GetStyleClass(this.axSymbologyControl.StyleClass).PreviewItem(pStyleGalleryItem,this.ptbPreview.Width,this.ptbPreview.Height);
System.Drawing.Imageimage=System.Drawing.Image.FromHbitmap(newSystem.IntPtr(picture.Handle));
this.ptbPreview.Image=image;
}
(9)当SymbologyControl的样式改变时,需要重新设置符号参数调整控件的可视性,故要添加SymbologyControl的OnStyleClassChanged事件,事件代码与Load事件类似,如下:
///
///当样式(Style)改变时,重新设置符号类型和控件的可视性
///
///
///
privatevoidaxSymbologyControl_OnStyleClassChanged(objectsender,ESRI.ArcGIS.Controls.ISymbologyControlEvents_OnStyleClassChangedEvente)
{
switch((esriSymbologyStyleClass)(e.symbologyStyleClass))
{
caseesriSymbologyStyleClass.esriStyleClassMarkerSymbols:
this.lblAngle.Visible=true;
this.nudAngle.Visible=true;
this.lblSize.Visible=true;
this.nudSize.Visible=true;
this.lblWidth.Visible=false;
this.nudWidth.Visible=false;
this.lblOutlineColor.Visible=false;
this.btnOutlineColor.Visible=false;
break;
caseesriSymbologyStyleClass.esriStyleClassLineSymbols:
this.lblAngle.Visible=false;
this.nudAngle.Visible=false;
this.lblSize.Visible=false;
this.nudSize.Visible=false;
this.lblWidth.Visible=true;
this.nudWidth.Visible=true;
this.lblOutlineColor.Visible=false;
this.btnOutlineColor.Visible=false;
break;
caseesriSymbologyStyleClass.esriStyleClassFillSymbols:
this.lblAngle.Visible=false;
this.nudAngle.Visible=false;
this.lblSize.Visible=false;
this.nudSize.Visible=false;
this.lblWidth.Visible=true;
this.nudWidth.Visible=true;
this.lblOutlineColor.Visible=true;
this.btnOutlineColor.Visible=true;
break;
}
}
5调用自定义符号选择器
通过以上操作,本符号选择器雏形已经完成,我们可以3sdnMap主窗体中调用并进行测试。
如果您已经完成“直接调用ArcMap中的符号选择器”这一节,请注释axTOCControl1_OnDoubleClick事件响应函数里的代码,并添加如下代码。
如果您是直接学习自定义符号选择器这一节的,请先添加axTOCControl1控件的OnDoubleClick事件,再添加如下事件响应函数代码:
///
///双击TOCControl控件时触发的事件
///
///
///
privatevoidaxTOCControl1_OnDoubleClick(objectsender,ITOCControlEvents_OnDoubleClickEvente)
{
esriTOCControlItemitemType=esriTOCControlItem.esriTOCControlItemNone;
IBasicMapbasicMap=null;
ILayerlayer=null;
objectunk=null;
objectdata=null;
axTOCControl1.HitTest(e.x,e.y,refitemType,refbasicMap,reflayer,refunk,refdata);
if(e.button==1)
{
if(itemType==esriTOCControlItem.esriTOCControlItemLegendClass)
{
//取得图例
ILegendClasspLegendClass=((ILegendGroup)unk).get_Class((int)data);
//创建符号选择器SymbolSelector实例
SymbolSelectorFrmSymbolSelectorFrm=newSymbolSelectorFrm(pLegendClass,layer);
if(SymbolSelectorFrm.ShowDialog()==DialogResult.OK)
{
//局部更新主Map控件
m_mapControl.ActiveView.PartialRefre
 升级会员
升级会员 