创建 canvas 的方法很简单.docx
《创建 canvas 的方法很简单.docx》由会员分享,可在线阅读,更多相关《创建 canvas 的方法很简单.docx(21页珍藏版)》请在冰豆网上搜索。

创建canvas的方法很简单
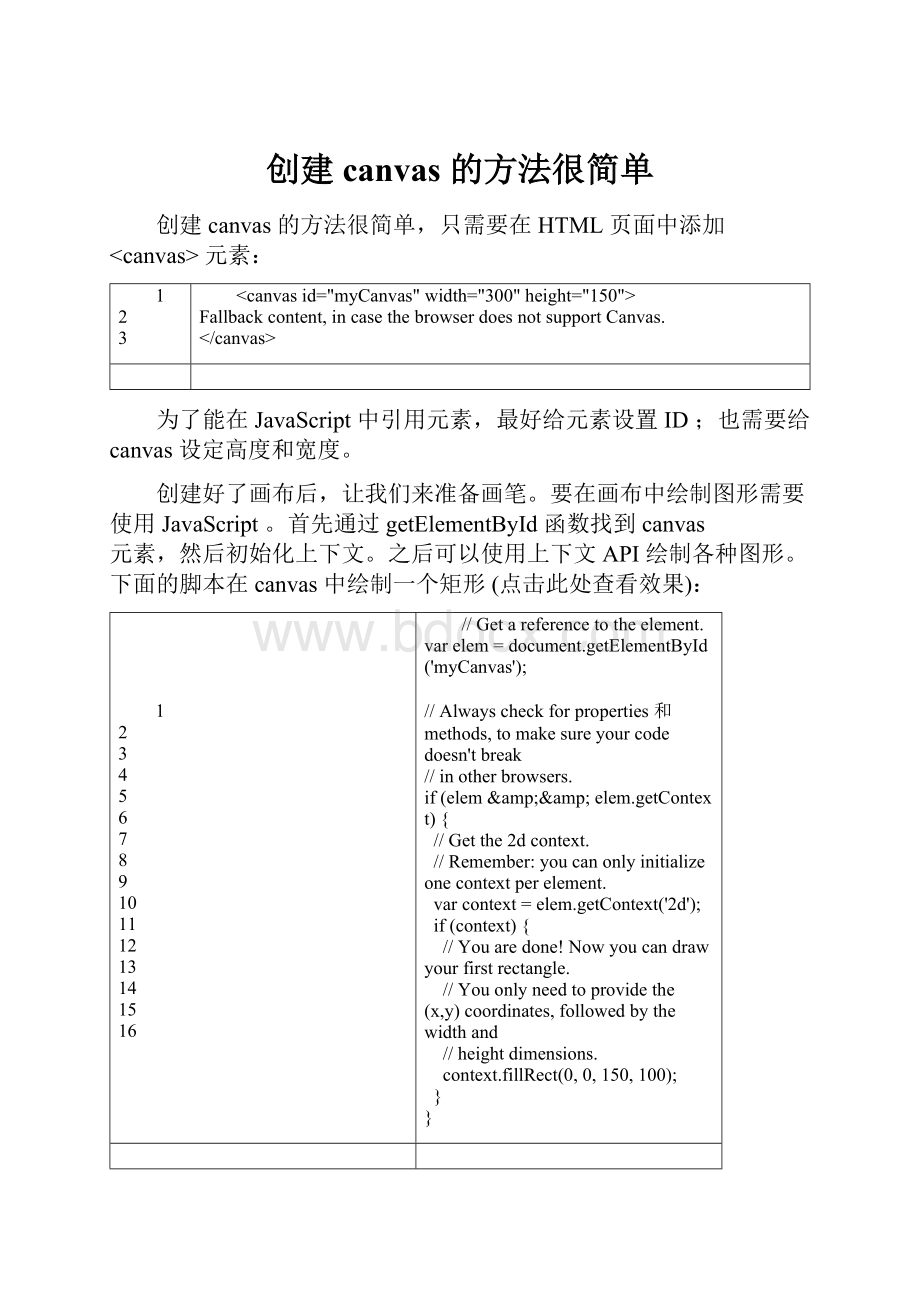
创建canvas的方法很简单,只需要在HTML页面中添加
1
2
3
Fallbackcontent,incasethebrowserdoesnotsupportCanvas.
为了能在JavaScript中引用元素,最好给元素设置ID;也需要给canvas设定高度和宽度。
创建好了画布后,让我们来准备画笔。
要在画布中绘制图形需要使用JavaScript。
首先通过getElementById函数找到canvas
元素,然后初始化上下文。
之后可以使用上下文API绘制各种图形。
下面的脚本在canvas中绘制一个矩形(点击此处查看效果):
1
2
3
4
5
6
7
8
9
10
11
12
13
14
15
16
//Getareferencetotheelement.
var elem = document.getElementById('myCanvas');
//Alwayscheckforproperties和methods,tomakesureyourcodedoesn'tbreak
//inotherbrowsers.
if (elem && elem.getContext) {
//Getthe2dcontext.
//Remember:
youcanonlyinitializeonecontextperelement.
var context = elem.getContext('2d');
if (context) {
//Youaredone!
Nowyoucandrawyourfirstrectangle.
//Youonlyneedtoprovidethe(x,y)coordinates,followedbythewidthand
//heightdimensions.
context.fillRect(0, 0, 150, 100);
}
}
可以把上面代码放置在文档head部分中,或者放在外部文件中。
2DcontextAPI
介绍了如何创建canvas后,让我们来看看2DcanvasAPI,看看能用这些函数做些什么。
基本线条
上面的例子中展示了绘制矩形是多么简单。
通过 fillStyle 和 strokeStyle 属性可以轻松的设置矩形的填充和线条。
颜色值使用方法和 CSS 一样:
十六进制数、rgb()、rgba()和 hsla()(若浏览器支持,如Opera10 和Firefox3)。
通过fillRect可以绘制带填充的矩形。
使用strokeRect可以绘制只有边框没有填充的矩形。
如果想清除部分canvas可以使用clearRect。
上述三个方法的参数相同:
x, y, width, height。
前两个参数设定(x,y)坐标,后两个参数设置矩形的高度和宽度。
可以使用 lineWidth 属性改变线条粗细。
让我们看看使用了fillRect,strokeRectclearRect和其他的例子:
1
2
3
4
5
6
7
8
9
context.fillStyle = '#00f'; //blue
context.strokeStyle = '#f00'; //red
context.lineWidth = 4;
//Drawsomerectangles.
context.fillRect (0, 0, 150, 50);
context.strokeRect(0, 60, 150, 50);
context.clearRect (30, 25, 90, 60);
context.strokeRect(30, 25, 90, 60);
此例子效果图见图1.
图1:
fillRect,strokeRect和
clearRect效果图
路径
通过canvas路径(path)可以绘制任意形状。
可以先绘制轮廓,然后绘制边框和填充。
创建自定义形状很简单,使用beginPath()开始绘制,然后使用直线、曲线和其他图形绘制你的图形。
绘制完毕后调用fill和stroke即可添加填充或者设置边框。
调用closePath()结束自定义图形绘制。
下面是一个绘制三角形的例子:
1
2
3
4
5
6
7
8
9
10
11
12
13
14
15
16
17
//Setthestyleproperties.
context.fillStyle = '#00f';
context.strokeStyle = '#f00';
context.lineWidth = 4;
context.beginPath();
//Startfromthetop-leftpoint.
context.moveTo(10, 10); //givethe(x,y)coordinates
context.lineTo(100, 10);
context.lineTo(10, 100);
context.lineTo(10, 10);
//Done!
Nowfilltheshape,和drawthestroke.
//Note:
yourshapewillnotbevisibleuntilyoucallanyofthetwomethods.
context.fill();
context.stroke();
context.closePath();
其效果图见图2.
图2:
三角形
另一个较负责的例子中使用了直线、曲线和圆弧。
插入图像
drawImage方法允许在canvas中插入其他图像
(img和canvas元素)。
在Opera中可以再canvas中绘制SVG图形。
此方法比较复杂,可以有3个、5个或9个参数:
∙3个参数:
最基本的drawImage使用方法。
一个参数指定图像位置,另两个参数设置图像在canvas中的位置。
∙5个参数:
中级的drawImage使用方法,包括上面所述3个参数,加两个参数指明插入图像宽度和高度(如果你想改变图像大小)。
∙9个参数:
最复杂drawImage杂使用方法,包含上述5个参数外,另外4个参数设置源图像中的位置和高度宽度。
这些参数允许你在显示图像前动态裁剪源图像。
下面是上述三个使用方法的例子:
1
2
3
4
5
6
7
8
9
10
11
//Threearguments:
theelement,destination(x,y)coordinates.
context.drawImage(img_elem, dx, dy);
//Fivearguments:
theelement,destination(x,y)coordinates,anddestination
//widthandheight(ifyouwanttoresizethesourceimage).
context.drawImage(img_elem, dx, dy, dw, dh);
//Ninearguments:
theelement,source(x,y)coordinates,sourcewidthand
//height(forcropping),destination(x,y)coordinates,anddestinationwidth
//andheight(resize).
context.drawImage(img_elem, sx, sy, sw, sh, dx, dy, dw, dh);
其效果见图3.
图3:
drawImage效果图。
像素级操作
2DContextAPI提供了三个方法用于像素级操作:
createImageData,getImageData,和
putImageData。
ImageData对象保存了图像像素值。
每个对象有三个属性:
width, height 和
data。
data 属性类型为CanvasPixelArray,用于储存width*height*4个像素值。
每一个像素有RGB值和透明度alpha值(其值为0至255,包括alpha在内!
)。
像素的顺序从左至右,从上到下,按行存储。
为了更好的理解其原理,让我们来看一个例子——绘制红色矩形
1
2
3
4
5
6
7
8
9
10
11
12
//CreateanImageDataobject.
var imgd = context.createImageData(50,50);
var pix = imgd.data;
//Loopovereachpixel和setatransparentred.
for (var i = 0; n = pix.length, i < n; i += 4) {
pix[i ] = 255; //redchannel
pix[i+3] = 127; //alphachannel
}
//DrawtheImageDataobjectatthegiven(x,y)coordinates.
context.putImageData(imgd, 0,0);
注意:
不是所有浏览器都实现了createImageData。
在支持的浏览器中,需要通过getImageData方法获取ImageData对象。
请参考示例代码。
通过ImageData可以完成很多功能。
如可以实现图像滤镜,或可以实现数学可视化(如分形和其他特效)。
下面特效实现了简单的颜色反转滤镜:
1
2
3
4
5
6
7
8
9
10
11
12
13
14
//GettheCanvasPixelArrayfromthegivencoordinatesanddimensions.
var imgd = context.getImageData(x, y, width, height);
var pix = imgd.data;
//Loopovereachpixelandinvertthecolor.
for (var i = 0, n = pix.length; i < n; i += 4) {
pix[i ] = 255 - pix[i ]; //red
pix[i+1] = 255 - pix[i+1]; //green
pix[i+2] = 255 - pix[i+2]; //blue
//i+3isalpha(thefourthelement)
}
//DrawtheImageDataatthegiven(x,y)coordinates.
context.putImageData(imgd, x, y);
图4显示了使用此滤镜后的Opera
图像(图3是原图)。
图4:
颜色反转滤镜
文字
虽然最近的WebKit版本和Firefox3.1nightlybuild才开始支持TextAPI,为了保证文章完整性我决定仍在这里介绍文字API。
context对象可以设置以下text属性:
∙font:
文字字体,同 CSS font-family属性
∙textAlign:
文字水平对齐方式。
可取属性值:
start,end,left,right,center。
默认值:
start.
∙textBaseline:
文字竖直对齐方式。
可取属性值:
top,hanging,middle,alphabetic,ideographic,bottom。
默认值:
alphabetic.
有两个方法可以绘制文字:
fillText和strokeText。
第一个绘制带 fillStyle 填充的文字,后者绘制只有 strokeStyle 边框的文字。
两者的参数相同:
要绘制的文字和文字的位置(x,y)坐标。
还有一个可选选项——最大宽度。
如果需要的话,浏览器会缩减文字以让它适应指定宽度。
文字对齐属性影响文字与设置的
(x,y)坐标的相对位置。
下面是一个在canvas中绘制”helloworld”文字的例子
1
2
3
4
5
6
context.fillStyle = '#00f';
context.font = 'italic30pxsans-serif';
context.textBaseline = 'top';
context.fillText ('Helloworld!
', 0, 0);
context.font = 'bold30pxsans-serif';
context.strokeText('Helloworld!
', 0, 50);
图5是其效果图。
图5:
文字效果
阴影
目前只有Konqueror和Firefox3.1nightlybuild支持ShadowsAPI。
API的属性为:
∙shadowColor:
阴影颜色。
其值和CSS颜色值一致。
∙shadowBlur:
设置阴影模糊程度。
此值越大,阴影越模糊。
其效果和Photoshop的高斯模糊滤镜相同。
∙shadowOffsetX和shadowOffsetY:
阴影的x和y偏移量,单位是像素。
下面是canvas阴影的例子:
1
2
3
4
5
6
context.shadowOffsetX = 5;
context.shadowOffsetY = 5;
context.shadowBlur = 4;
context.shadowColor = 'rgba(255,0,0,0.5)';
context.fillStyle = '#00f';
context.fillRect(20, 20, 150, 100);
其效果见图6。
图6:
canvas阴影效果——蓝色矩形,红色阴影
颜色渐变
除了CSS颜色,fillStyle和strokeStyle属性可以设置为CanvasGradient对象。
——通过CanvasGradient可以为线条和填充使用颜色渐变。
欲创建CanvasGradient对象,可以使用两个方法:
createLinearGradient和createRadialGradient。
前者创建线性颜色渐变,后者创建圆形颜色渐变。
创建颜色渐变对象后,可以使用对象的addColorStop方法添加颜色中间值。
下面的代码演示了颜色渐变使用方法:
1
2
3
4
5
6
7
8
9
10
11
12
13
14
15
16
17
18
19
20
//Youneedtoprovidethesource和destination(x,y)coordinates
//forthegradient(fromwhereitstarts和whereitends).
var gradient1 = context.createLinearGradient(sx, sy, dx, dy);
//Nowyoucanaddcolorsinyourgradient.
//Thefirstargumenttellsthepositionforthecolorinyourgradient.The
//acceptedvaluerangeisfrom0(gradientstart)to1(gradientend).
//Thesecondargumenttellsthecoloryouwant,usingtheCSScolorformat.
gradient1.addColorStop(0, '#f00'); //red
gradient1.addColorStop(0.5, '#ff0'); //yellow
gradient1.addColorStop(1, '#00f'); //blue
//Fortheradialgradientyoualsoneedtoprovidesource
//和destinationcircleradius.
//The(x,y)coordinatesdefinethecirclecenterpoints(start和
//destination).
var gradient2 = context.createRadialGradient(sx, sy, sr, dx, dy, dr);
//Addingcolorstoaradialgradientisthesameasaddingcolorstolinear
//gradients.
我也准备了一个更复杂的例子,使用了线性颜色渐变、阴影和文字。
其效果见图7。
图7:
使用线性颜色渐变的例子
canvas演示
如果你想知道使用Canvas可以做些什么,可以参看以下的工程:
∙OperaWidget:
oSimAquarium
oArtist’sSketchbook
oSpirograph
∙在线工程和演示
oNewtonpolynomial
oCanvascape–“3DWalker”
oPaint.Web–paintingdemo,open-source
oStar-fieldflight
oInteractiveblob
小节
Canvas是 HTML5最让人期待的特性之一,目前已获得大部分Web浏览器支持。
Canvas可以帮助创建游戏、增强图形用户界面。
2DcontextAPI提供大量图形绘制功能——我希望通过本文你了解了canvas使用,并且你有兴趣了解更多!
本文转自:
operachina
本文翻译自 HTML5canvas–thebasics
作者 MihaiSucan
相关日志
应用图像Usingimages
Oneofthemorefunfeaturesofthecanvasistheabillitytouseimages.Thesecanbeusedtododynamicphotocompositingorusedasbackdropsofgraphsetc.It'scurrentlyalsotheonlywaytoaddtexttothem(Thespecificationdoesnotcontainanyfunctionstodrawtext).ExternalimagescanbeusedinanyformatsupportedbyGecko(e.g.PNG,GIForJPEGformat).Othercanvaselementsonthesamepagecanalsobeusedasthesource.
Canvas相当有趣的一项功能就是可以引入图像,它可以用于图片合成或者制作背景等。
而目前仅可以在图像中加入文字(标准说明中并没有包含绘制文字的功能)。
只要是Gecko支持的图像(如PNG,GIF,JPEG等)都可以引入到canvas中,而且其它的canvas元素也可以作为图像的来源。
引入图像Importingimages
Importingimagesisbasicallyatwostepprocess:
引入图像只需要简单的两步:
∙FirstlyweneedareferencetoaJavaScriptImageobjectorothercanvaselementasasource.Itisn'tpossibletouseimagesbysimplyprovidingaURL/pathtothem.
∙Secondlywedrawtheimageonthecanvasusingthe drawImage function.
∙第一当然是来源图片,不是简单的URL路径,但可以是一个JavaScript的Image对象引用,又或者其它的canvas元素。
∙然后用 drawImage 方法将图像插入到canvas中。
Let'slookatsteponefirst.Therearebasicallyfouroptionsavailable:
先来看看第一步,基本上有四种可选方式:
引用页面内的图片Usingimageswhichareonthesamepage
Wecanaccessallimagesonapagebyusingeitherthe document.images collection,thedocument.getElementsByTagName method,orifweknowtheIDattributeoftheimage,thedocument.getElementById method.
我们可以通过 document.images 集合、document.getElementsByTagName 方法又或者document.getElementById 方法来获取页面内的